Put your own realistic rope bridge with real-time physics into your game in minutes.
Build your bridge
Bridge Master Unity Asset is designed for delivering any type of bridges into your game where real-time physics make sense to be visualized. From a crumbling rope bridge, through the various type of suspension bridges to the cable-stayed mega structures with dozens of towers. There’s no limit for your imagination.


Made for…
- Game developers – for all genre, like adventure, racing, FPS and so on…
- Level designers – making either large and small-scale environments.
- Utility software developers.
- Engineers and architects, to visualize ideas.
- VFX studios, designers, content creators.
Made for…
- Game developers – for all genre, like adventure, racing, FPS and so on…
- Level designers – making either large and small-scale environments.
- Utility software developers.
- Engineers and architects, to visualize ideas.
- VFX studios, designers, content creators.
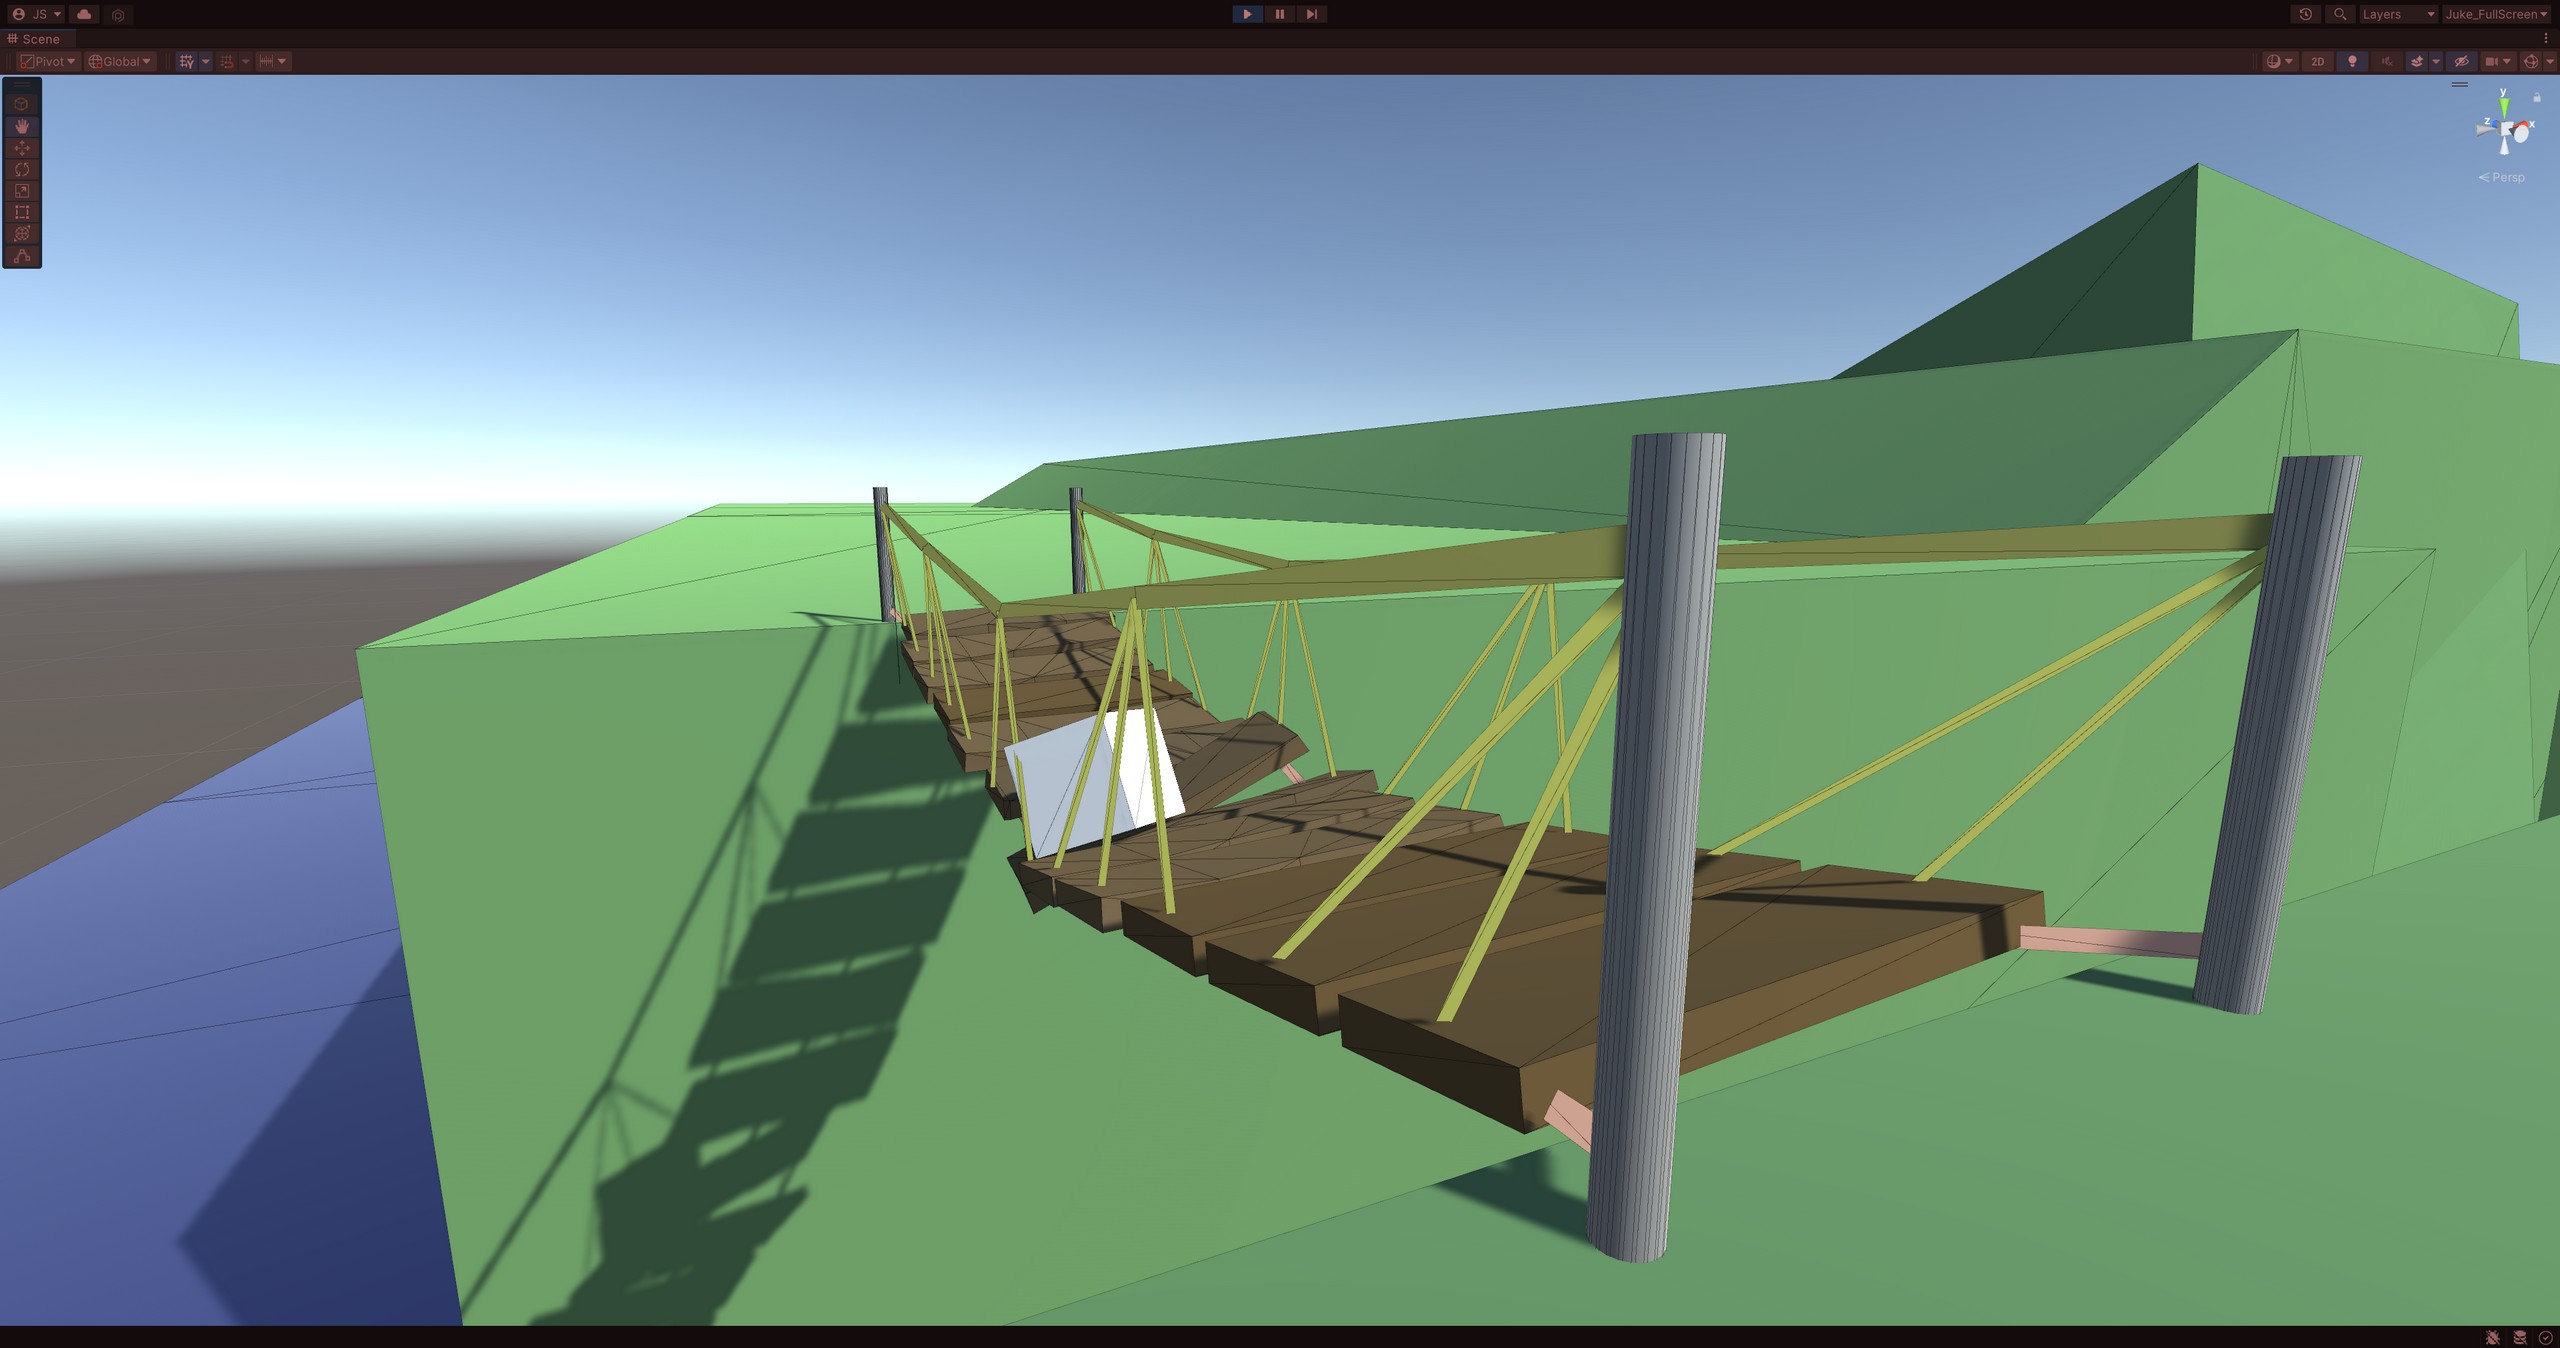
Rapid design

Imagine a bridge
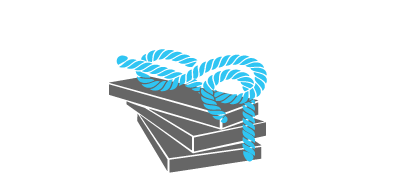
Break it down into elements

Setup planks

Add towers
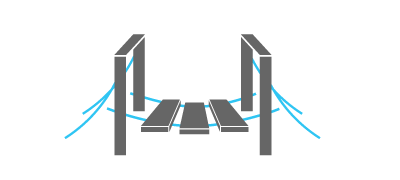
Connect them with ropes

Run your scene

Full equipment

Source code included
The source code is delivered with your package. The whole code is written in C# and the extensive inline documentation supports your team to extend the capabilities of Bridge Master according to your needs.
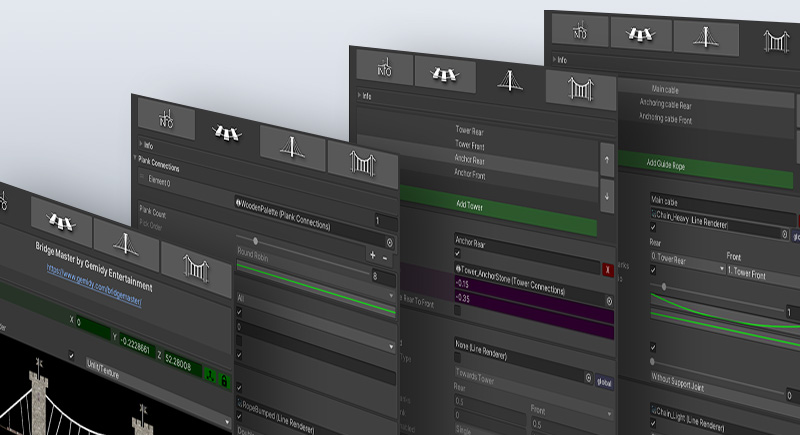
Comprehensive customization
Enjoy the freedom of using your own assets to build a unique and stunning bridge. Add your 3D models and materials, and configure the building blocks of your bridge, such as towers, planks, main cables, stay cables, anchors and support ropes.
Real-time physics
The generated bridge is highly optimized due to various structural considerations built into this tool. The resulting interactive construction can easily run on a machine with restricted resources, even on a mobile device. Still, the underlying physics system remains the standard physics that comes with Unity.
Instant visual designer
Rapid visual editing tools support your process of making extraordinary architectures thanks to the seamless integration with the Unity Editor. No wait times, no progress bars, all settings are applied immediately for the instant results.
Gallery
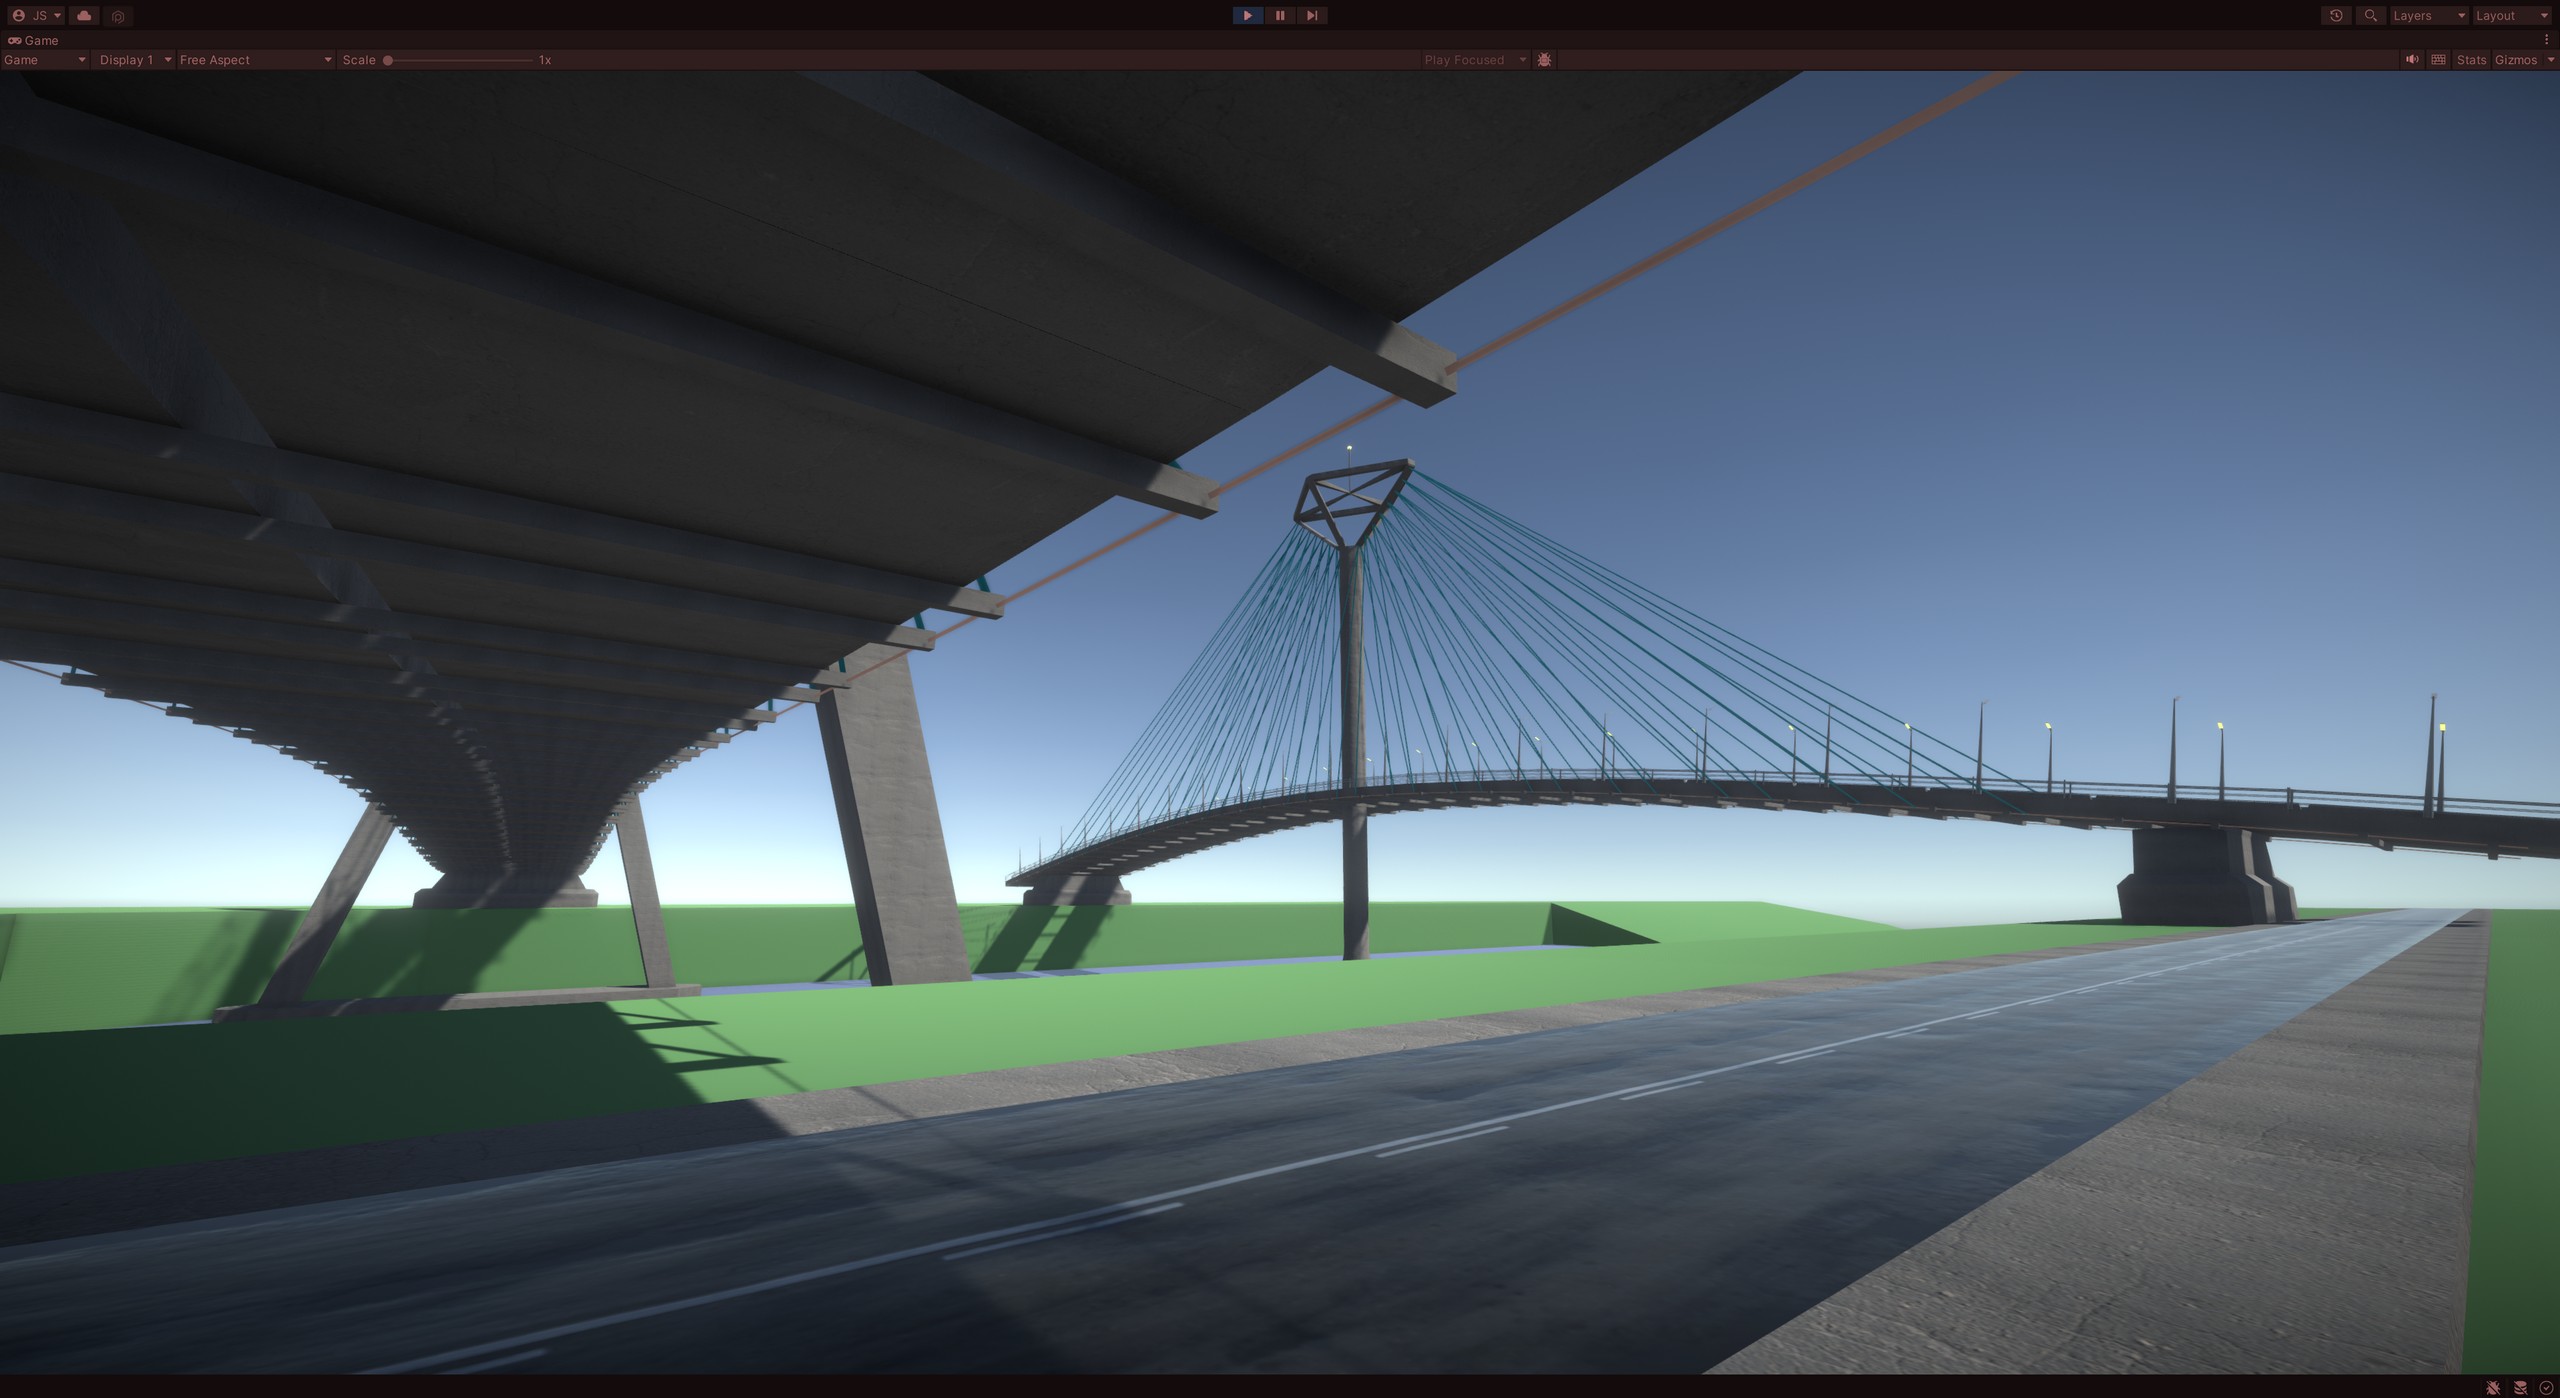
View from under a suspension bridge
Scene: Showcase
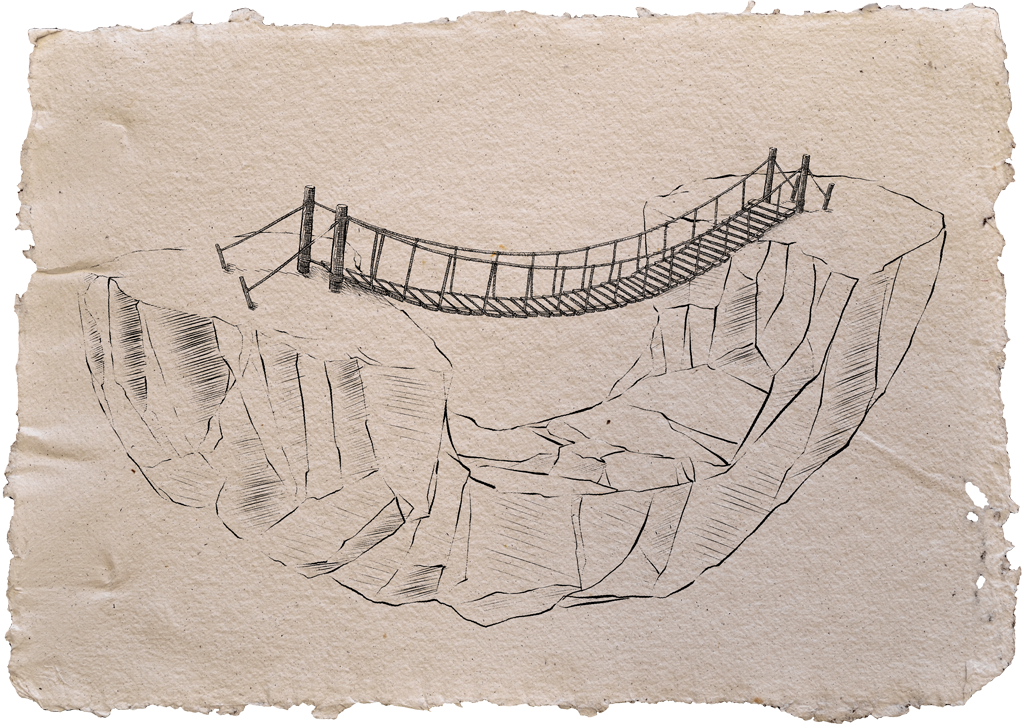
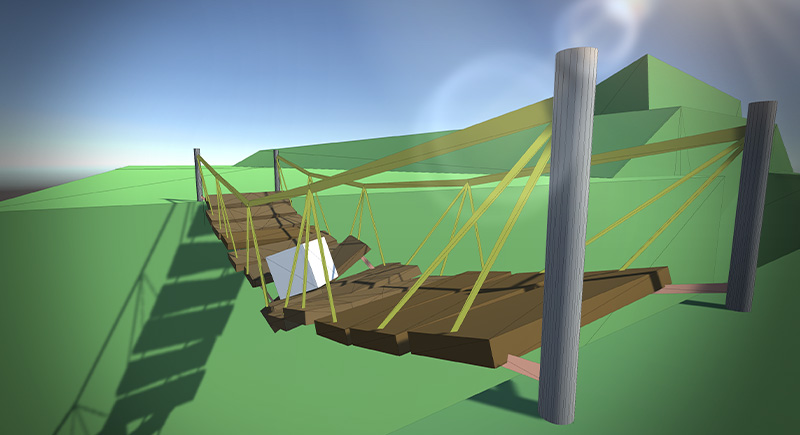
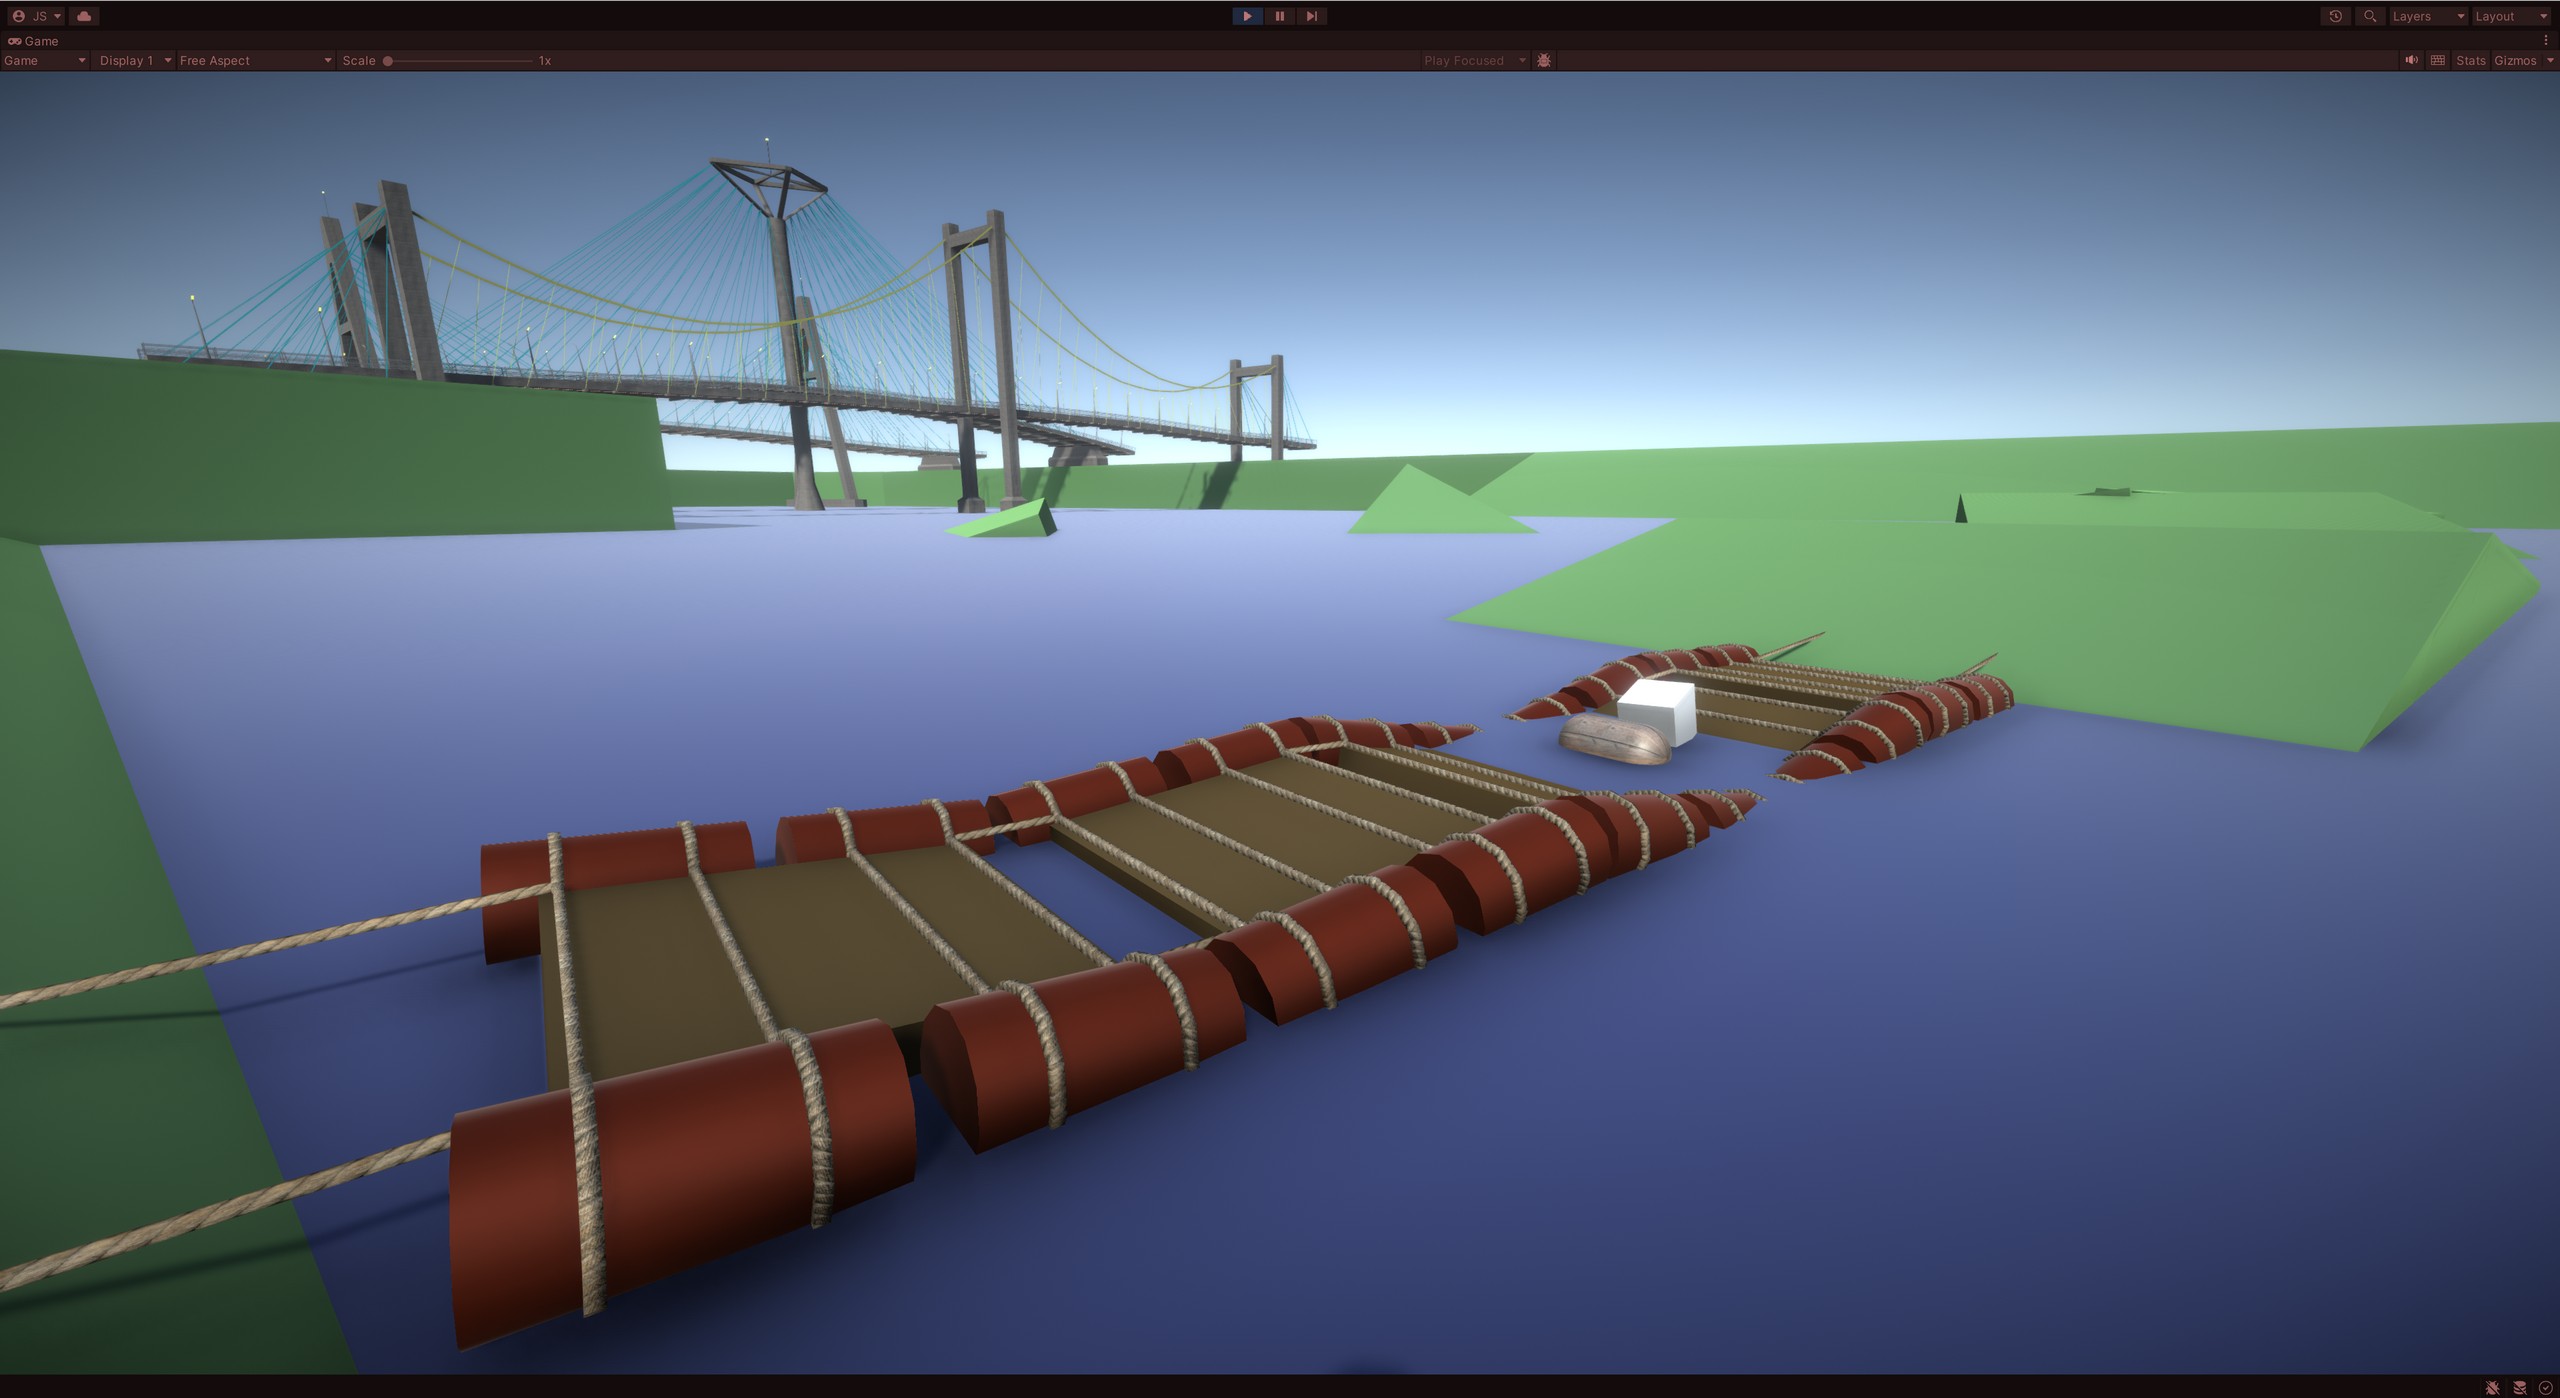
A simple rope bridge
Scene: Showcase

Various type of bridges, all is dynamic
Scene: Showcase
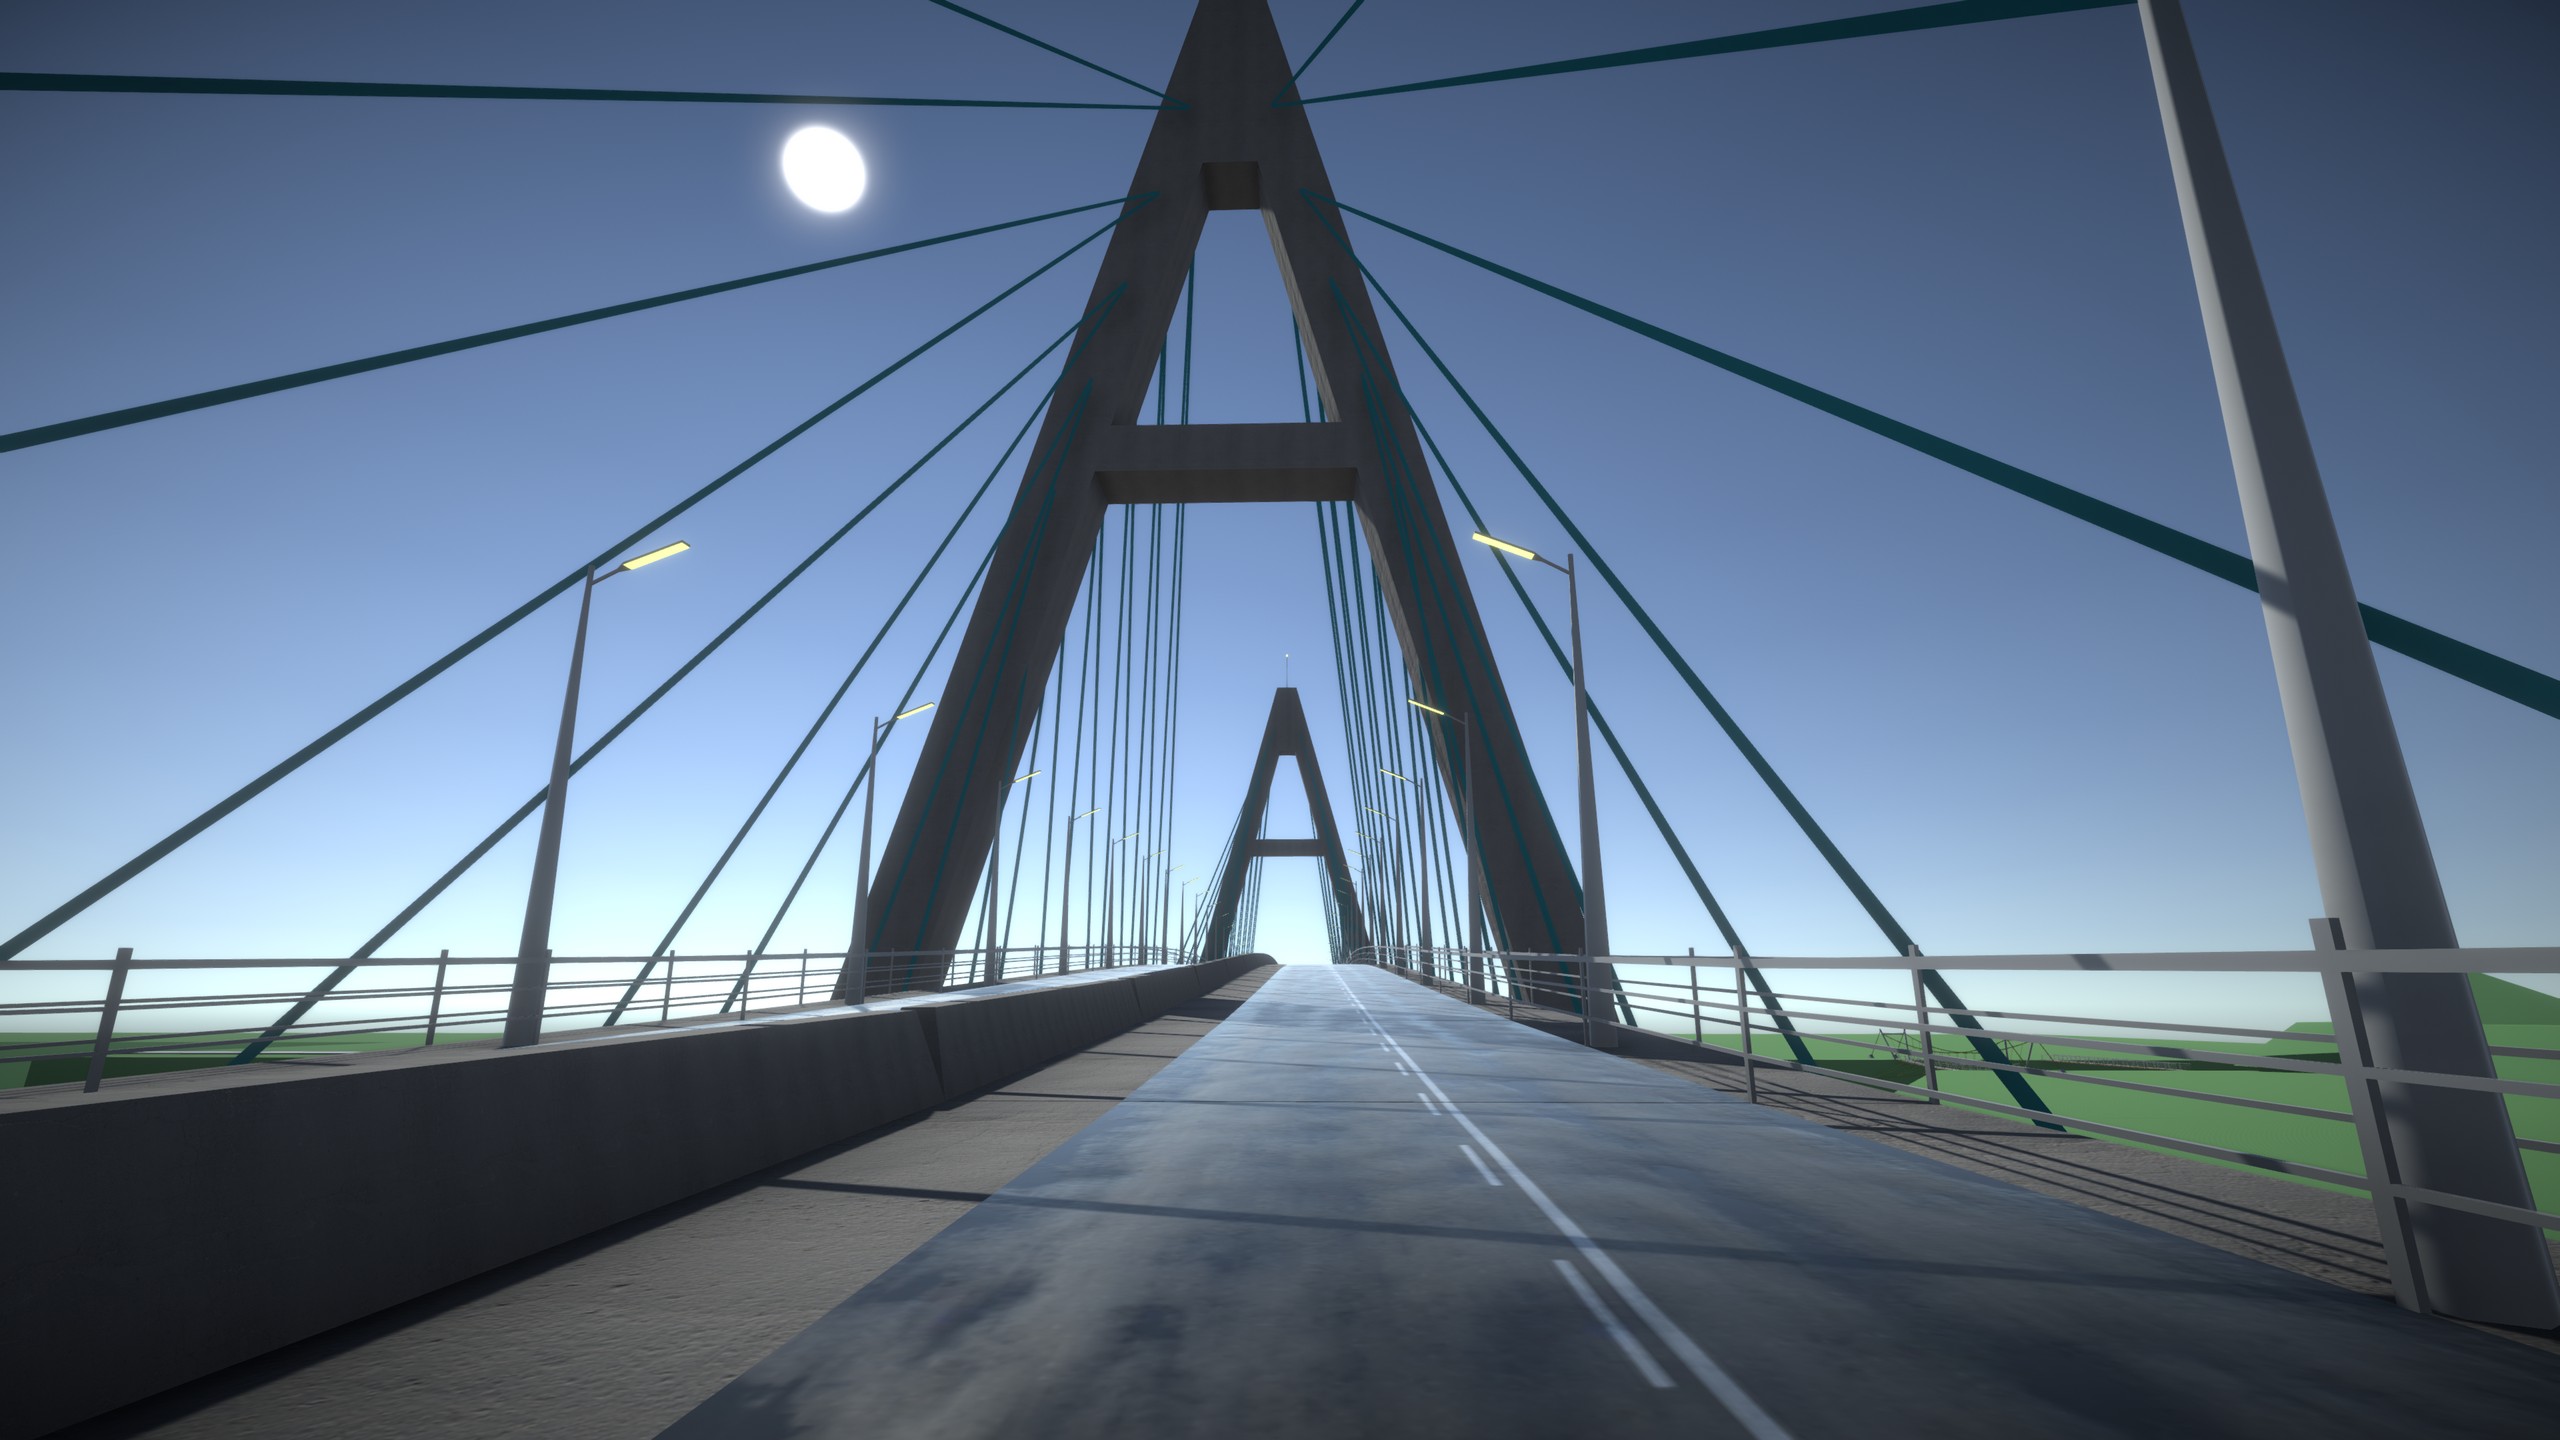
Walking on the MedYeri cable-stayed bridge
Scene: Showcase
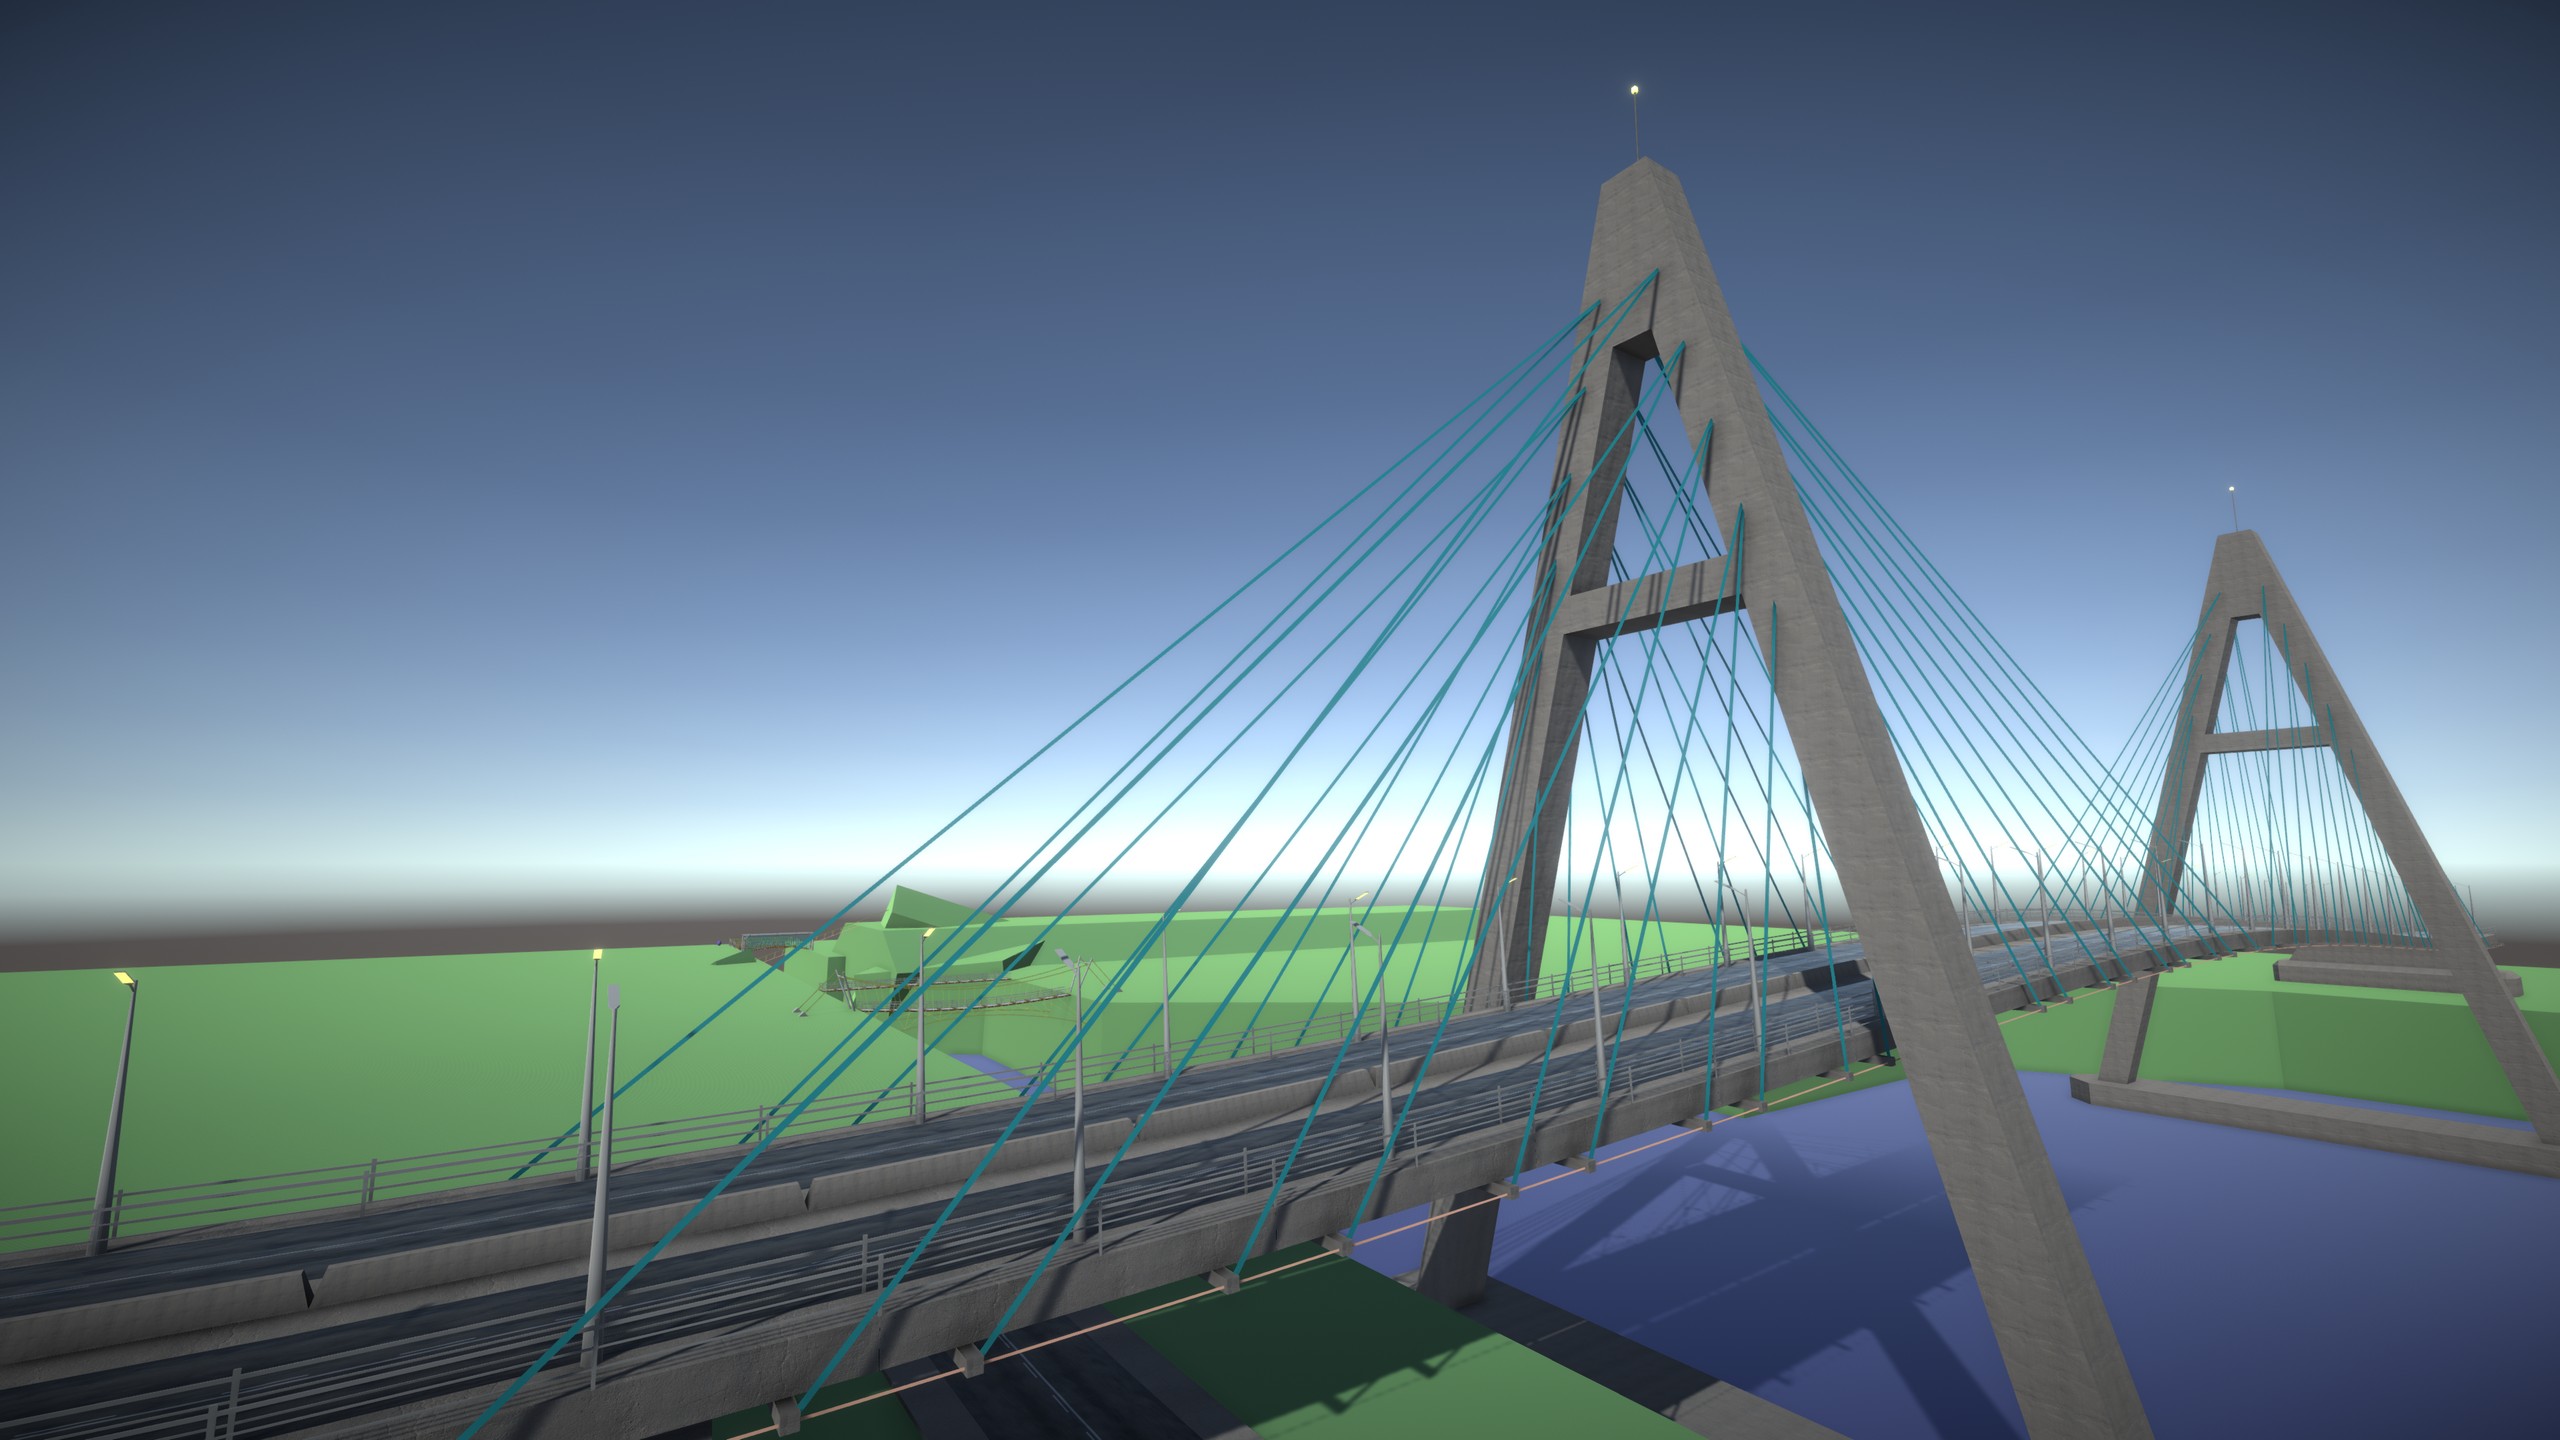
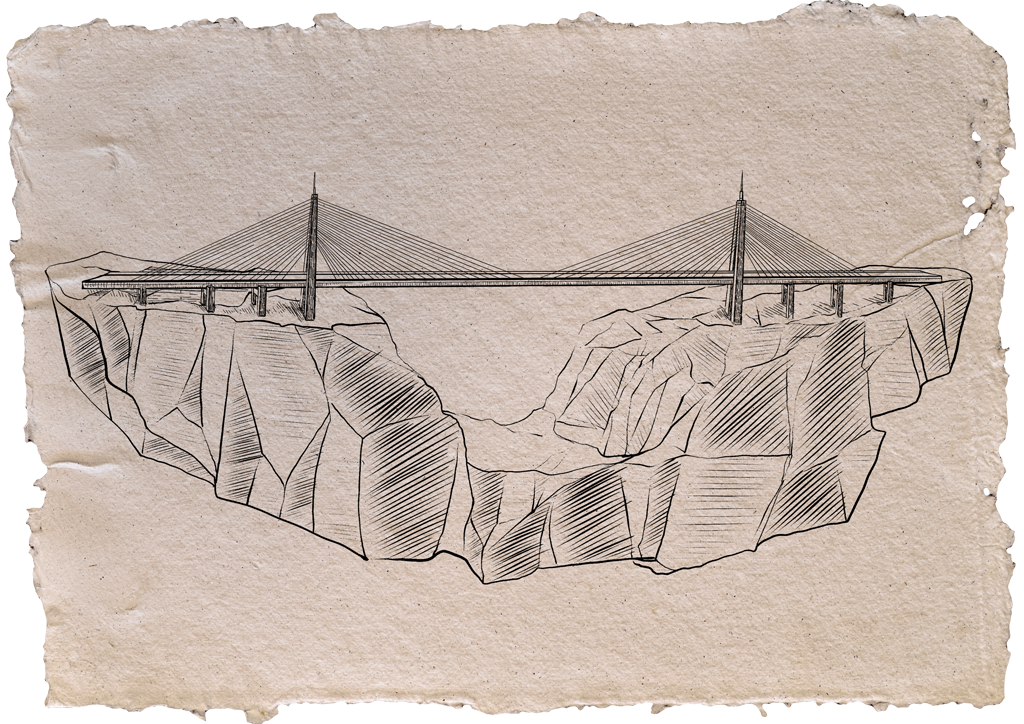
The MedYeri cable-stayed bridge
Scene: Showcase
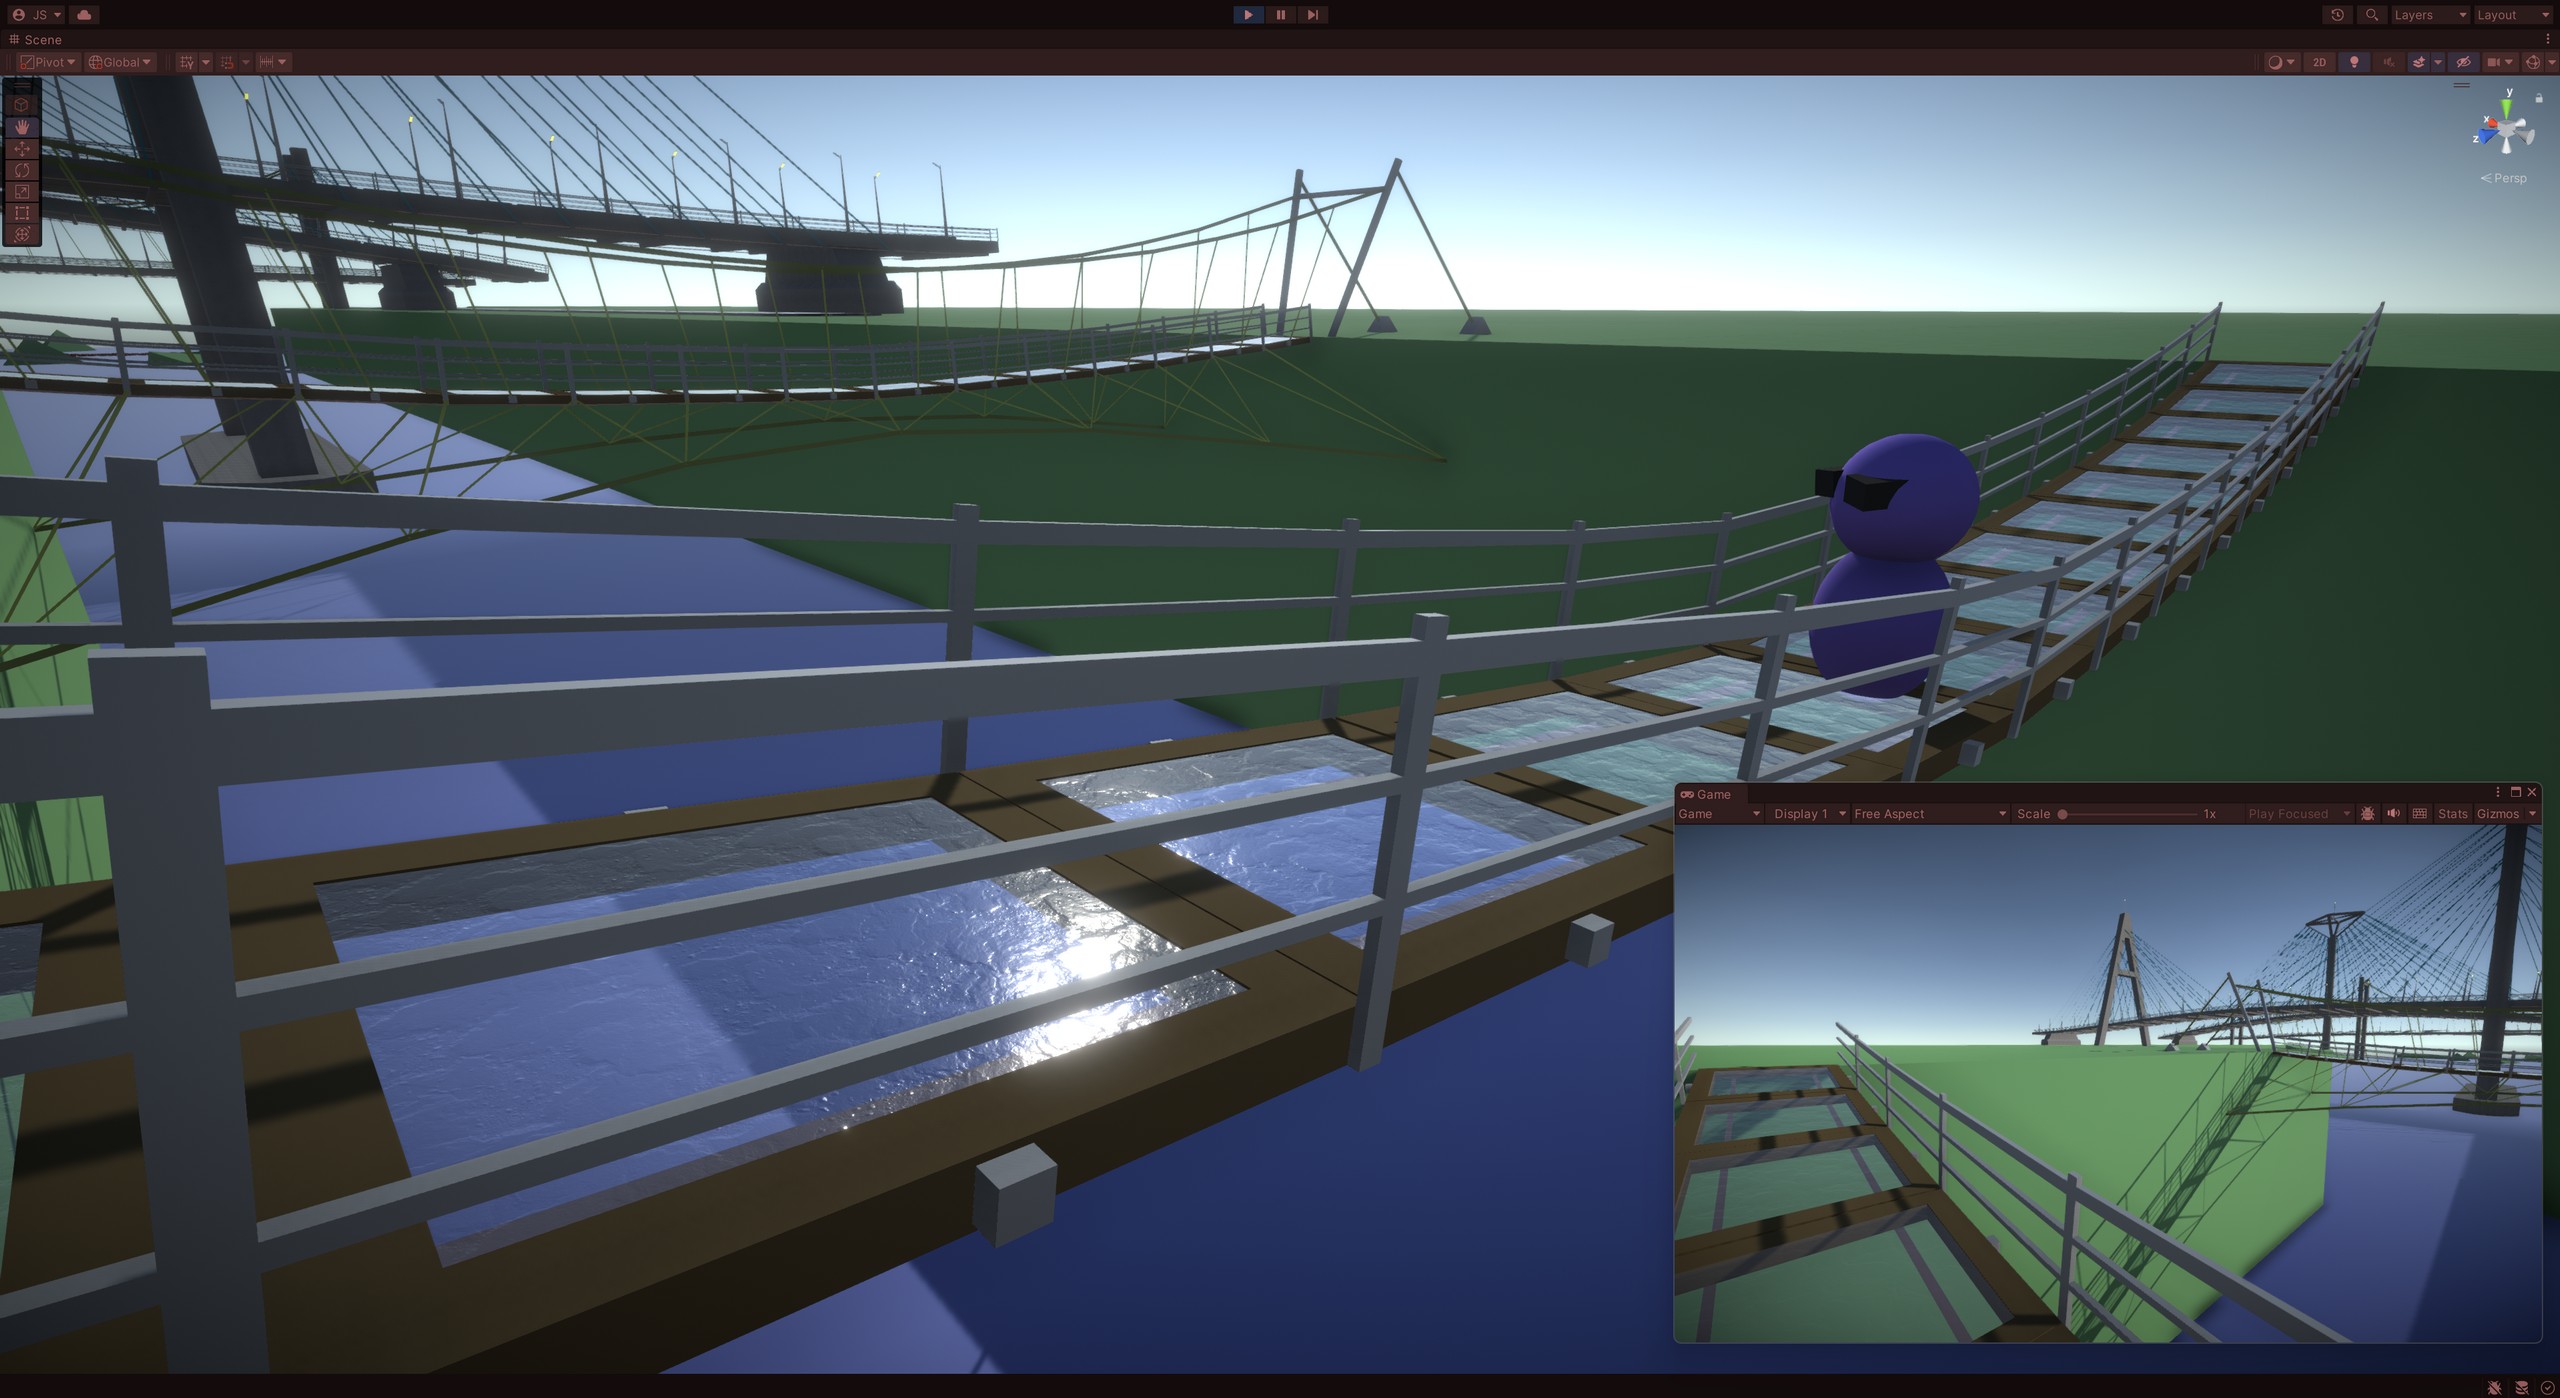
FPS character on the Canyon bridge
Scene: Showcase
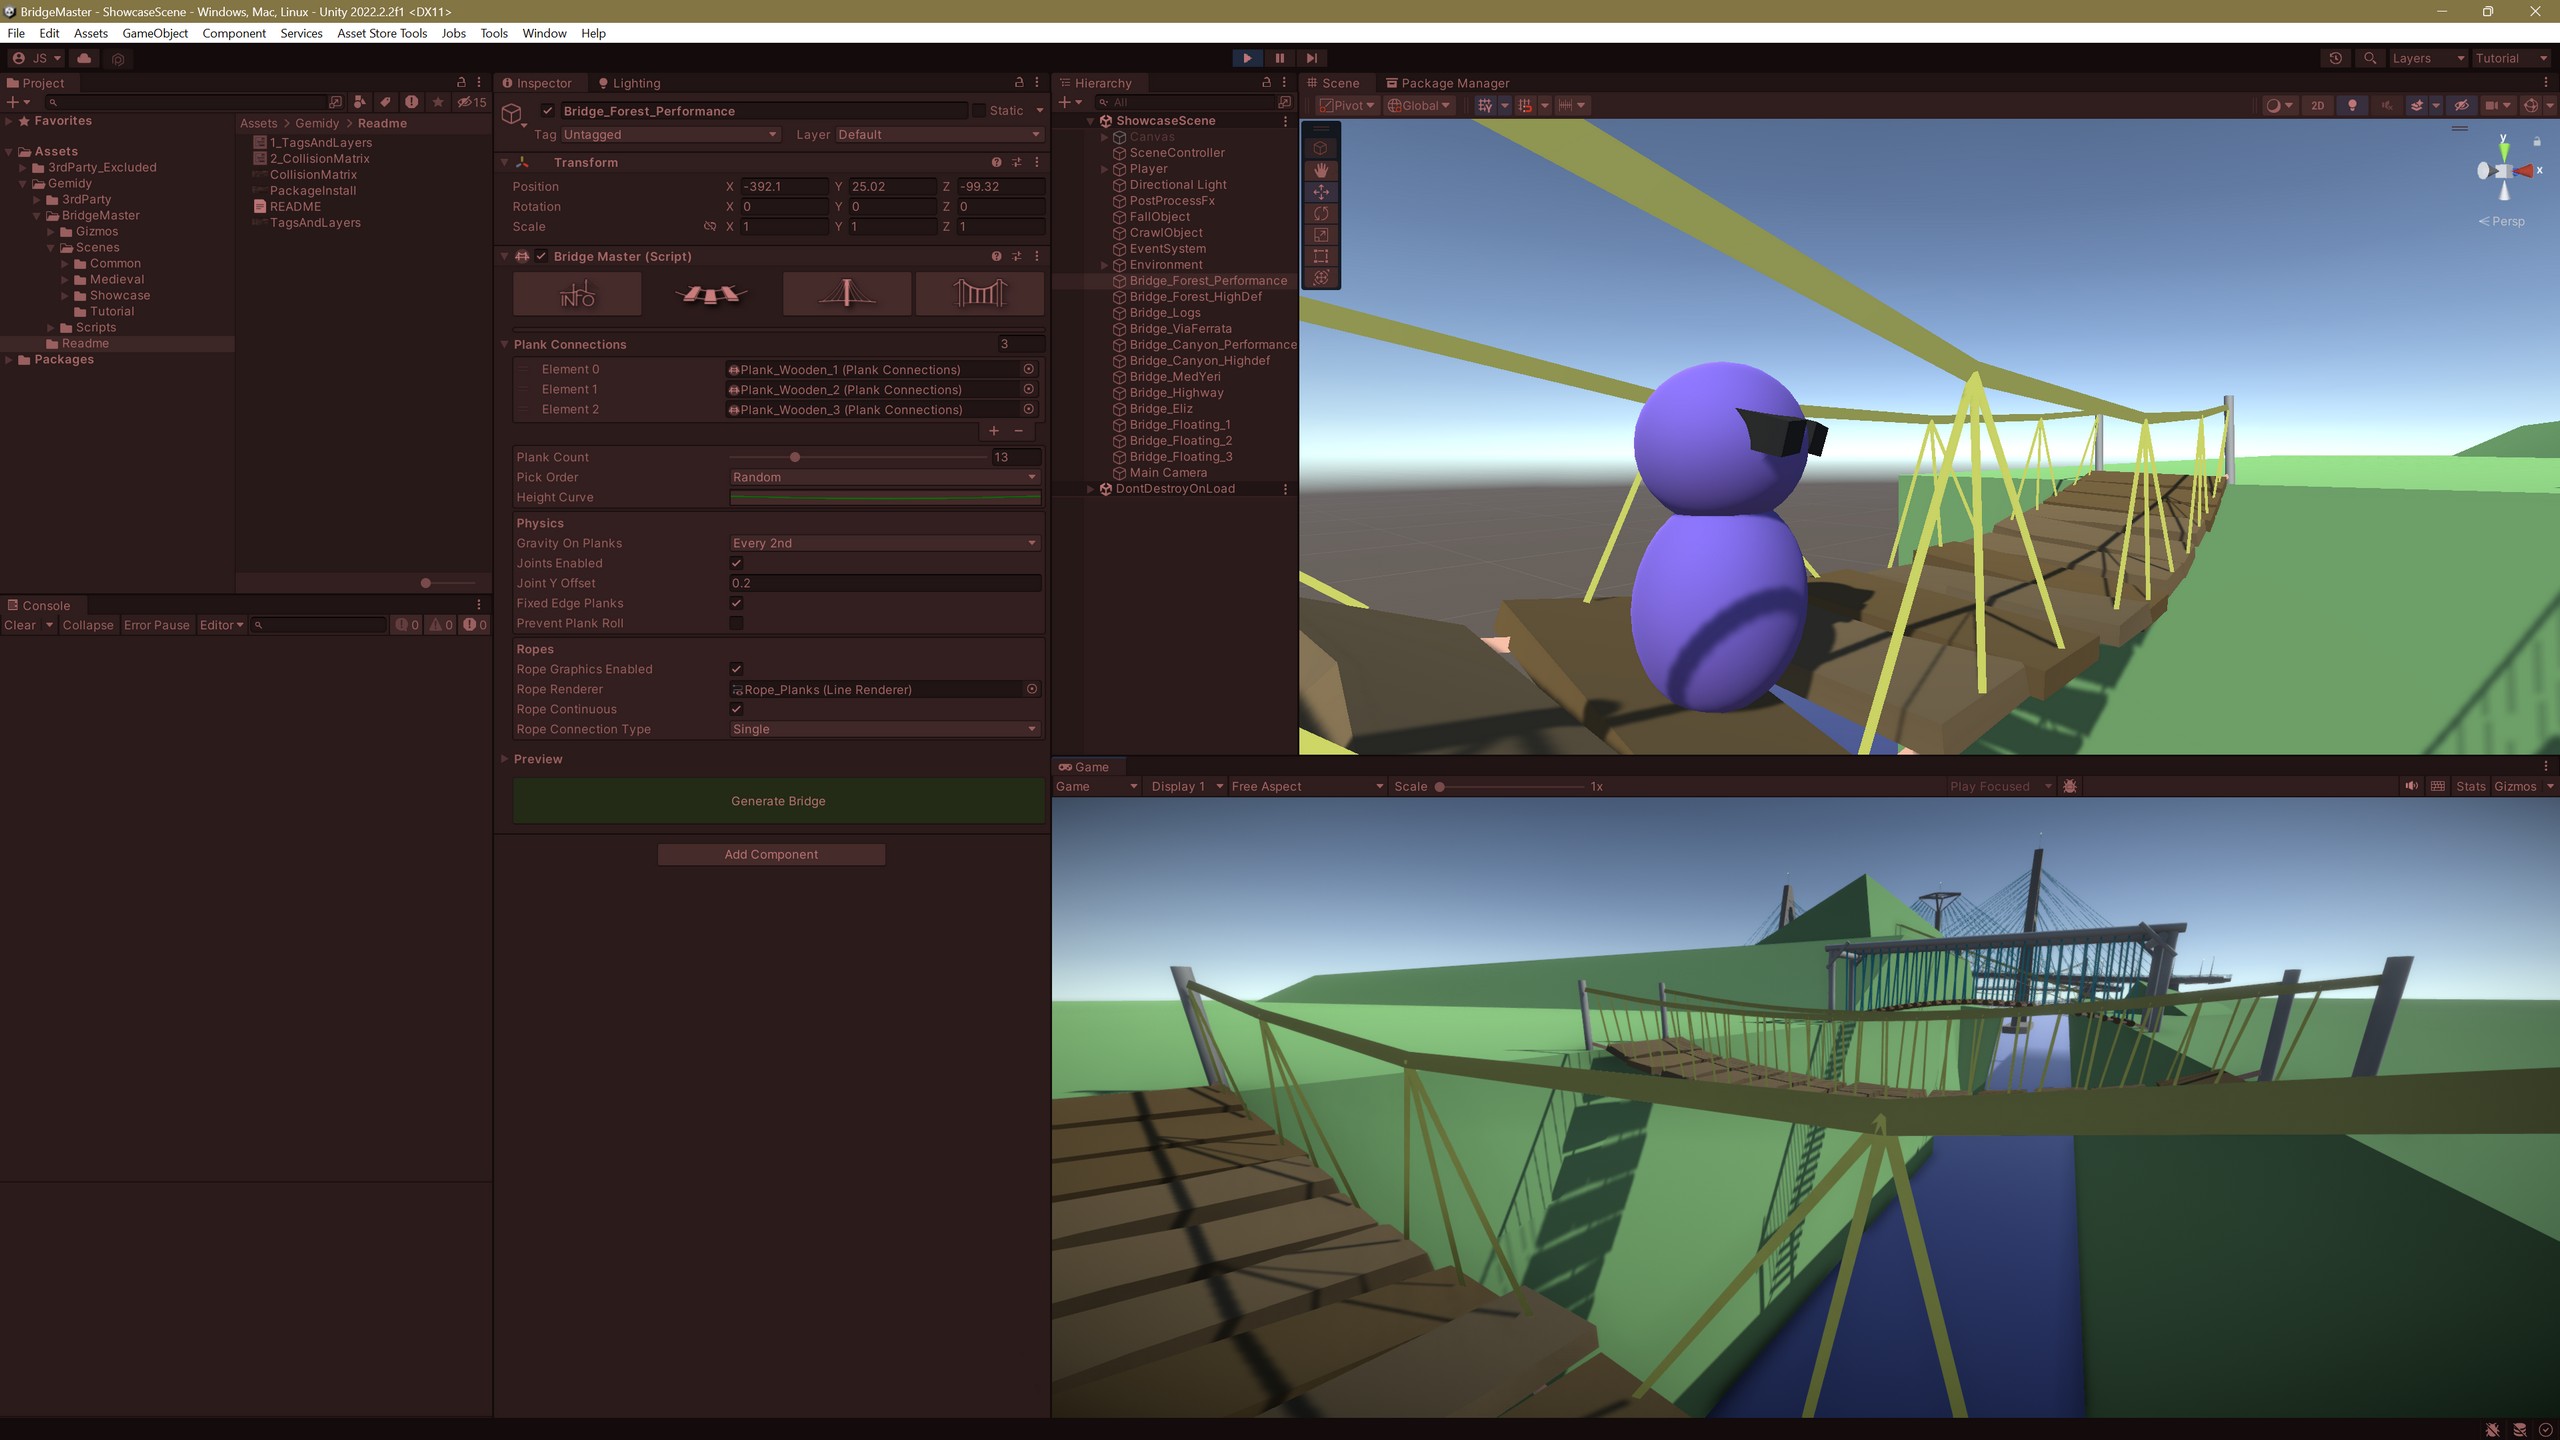
Test your bridges with the FPS character
Scene: Showcase
Floating barrels on water (fake buoyancy)
Scene: Showcase
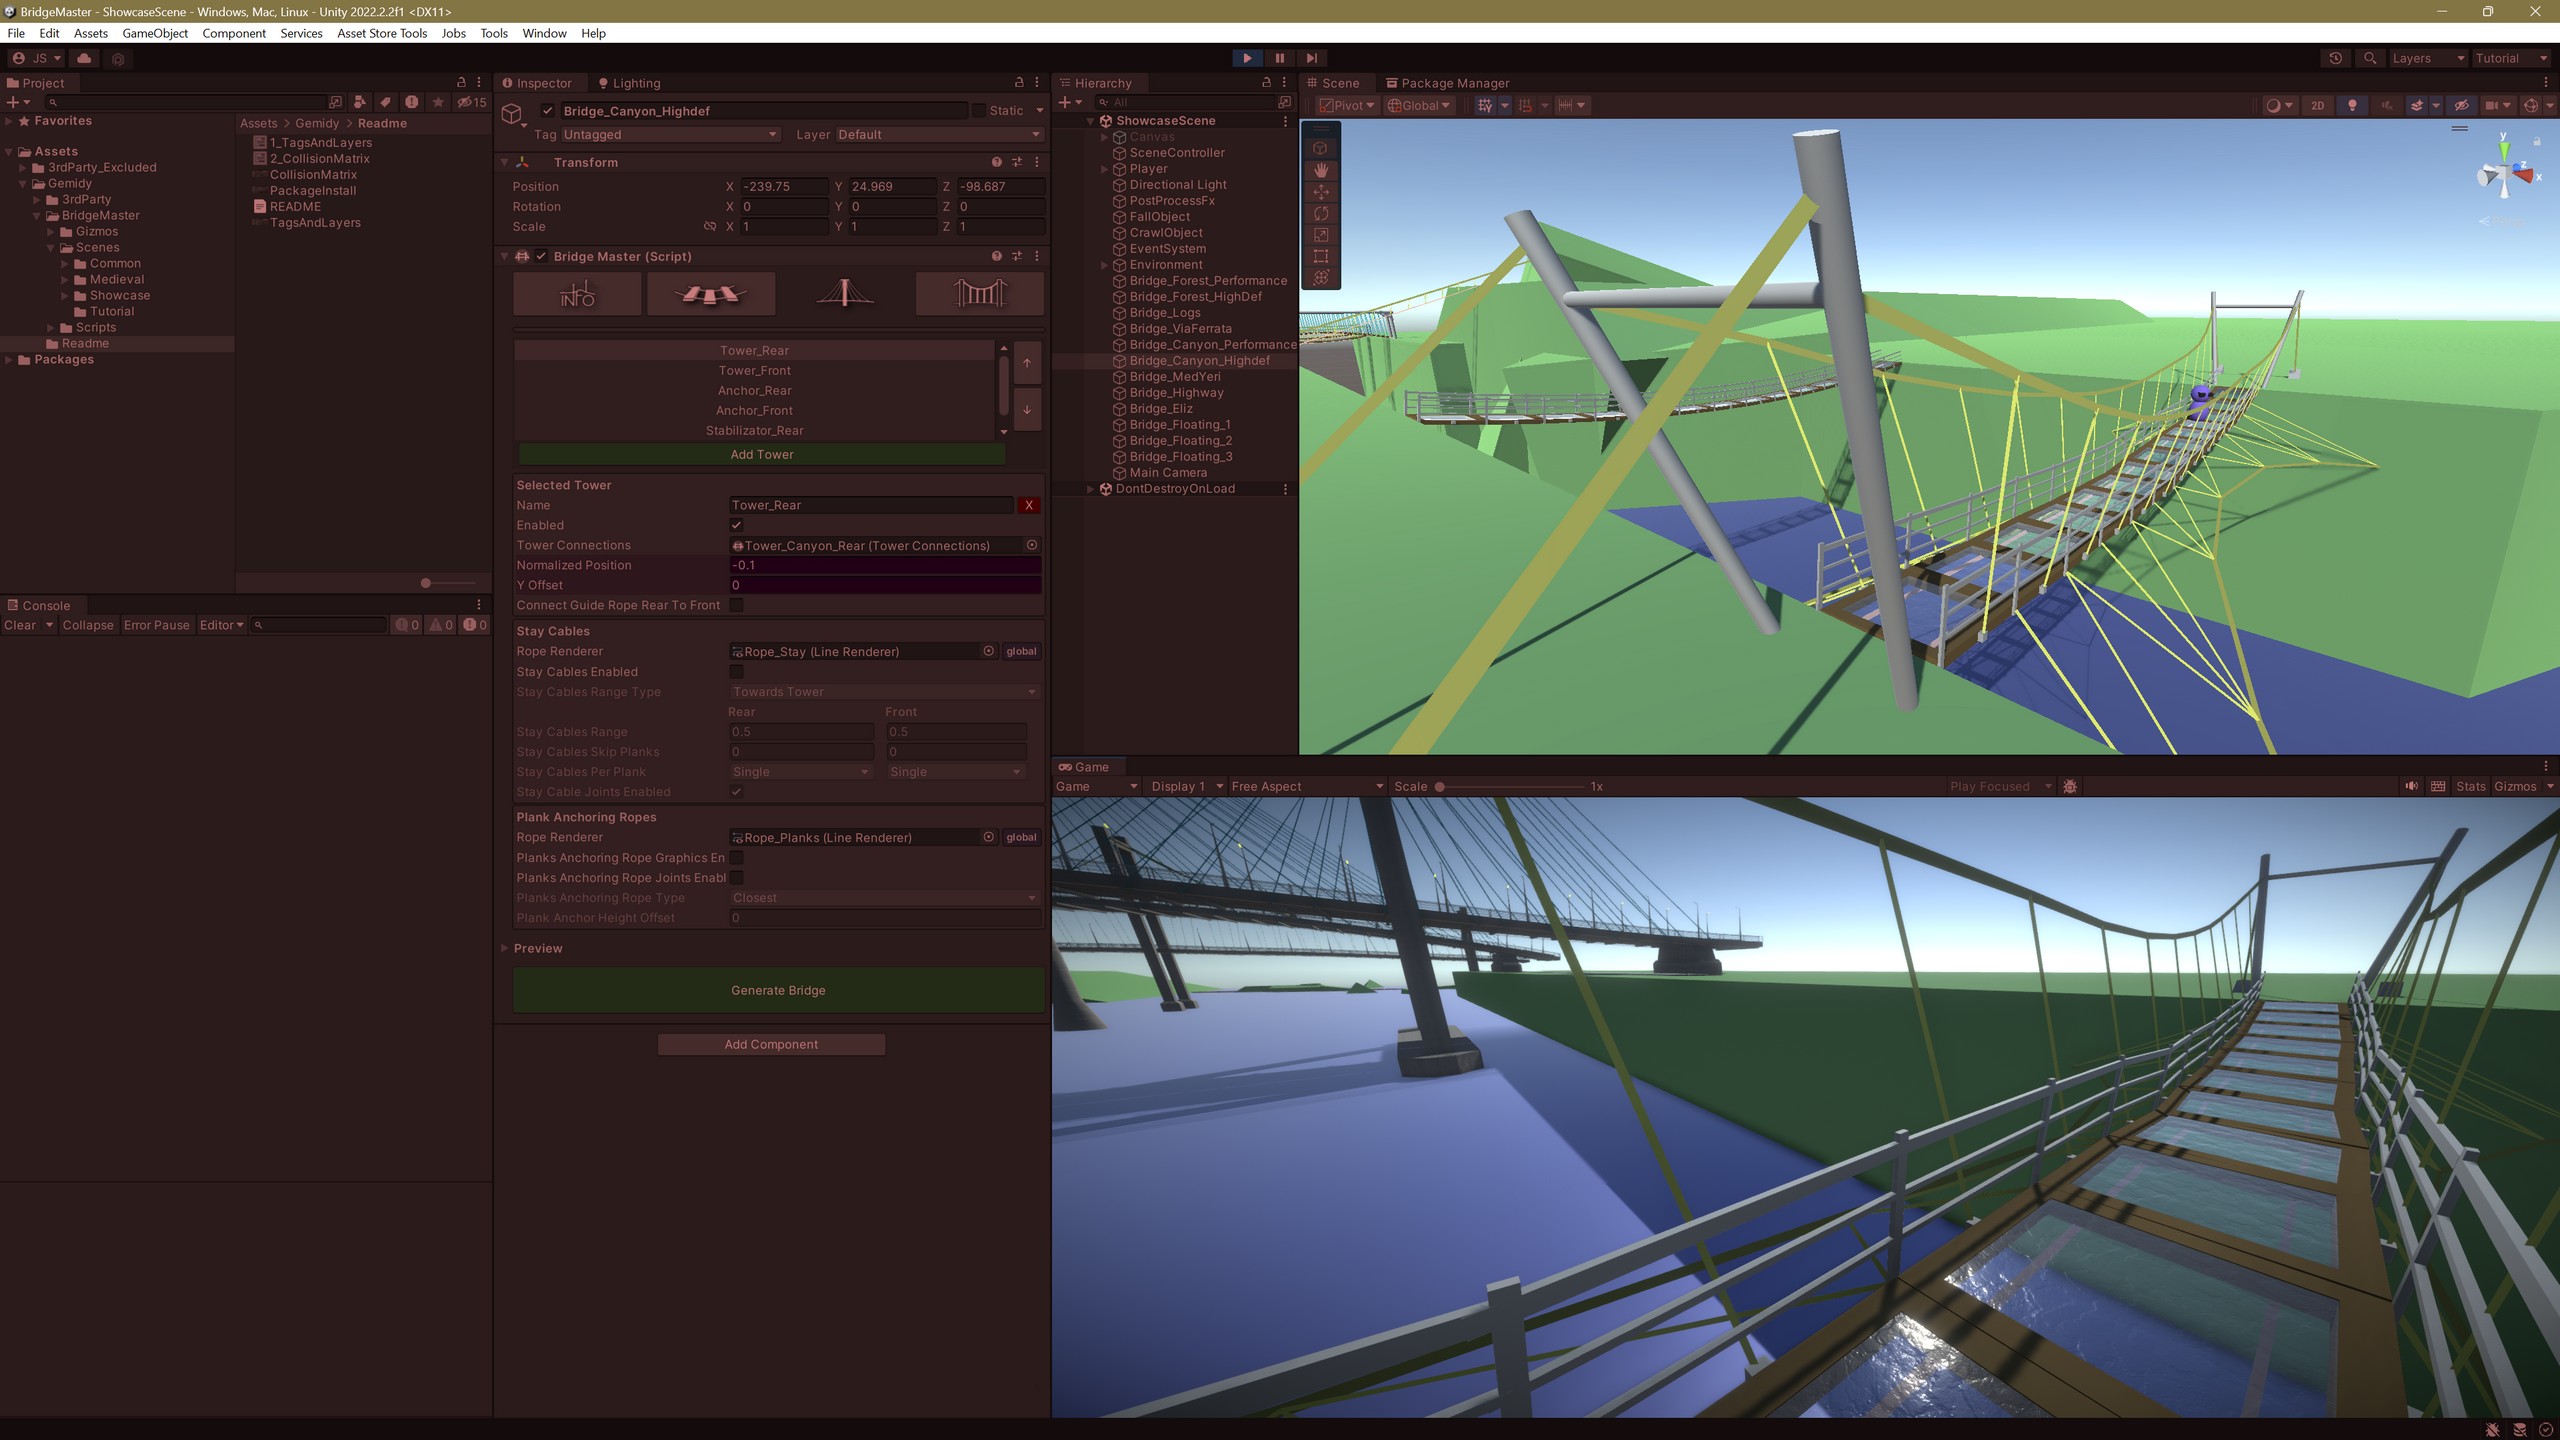
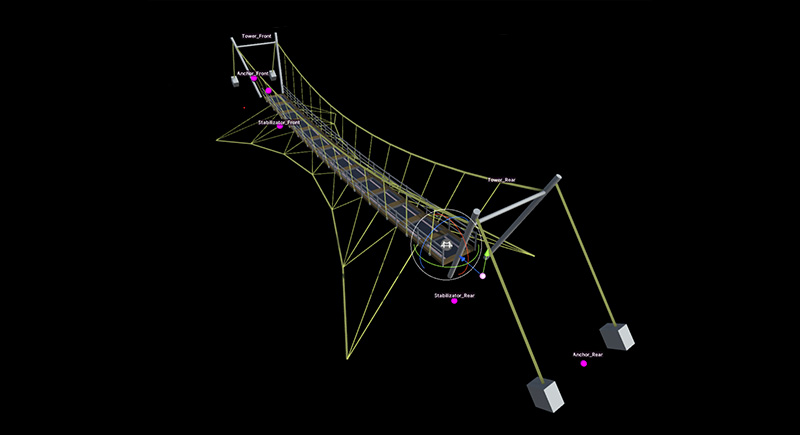
The Canyon bridge with stabilizator cables
Scene: Showcase
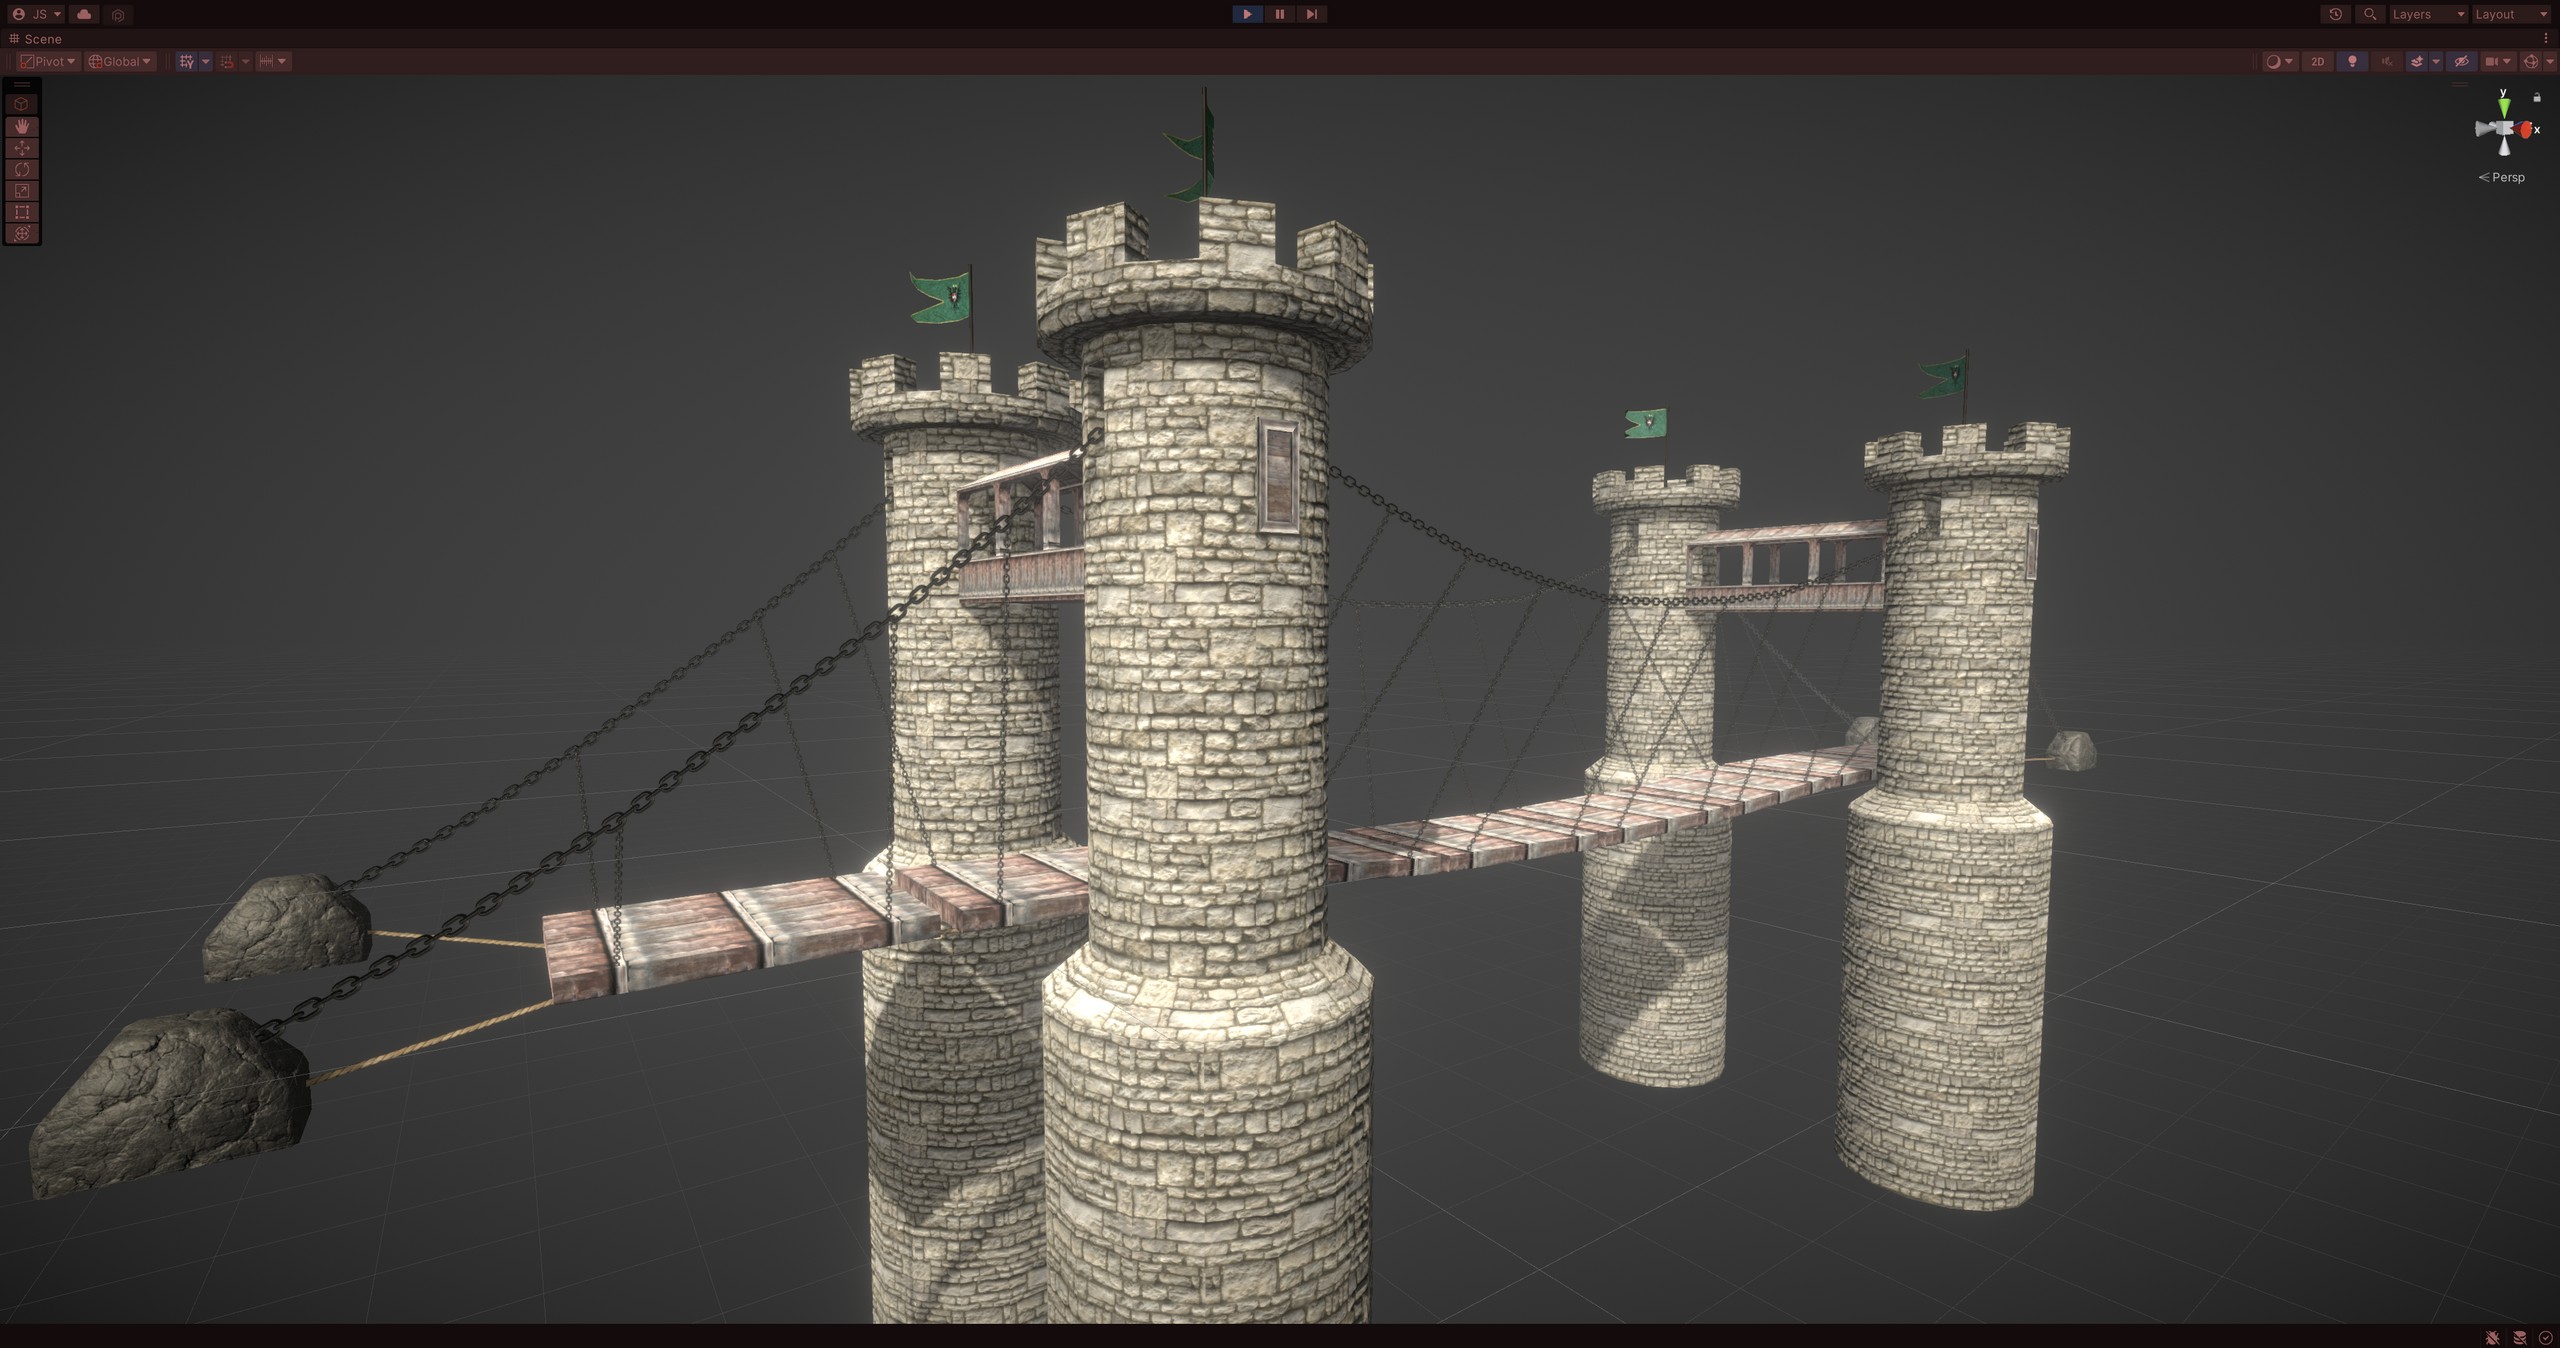
Medieval bridge
Scene: Medieval
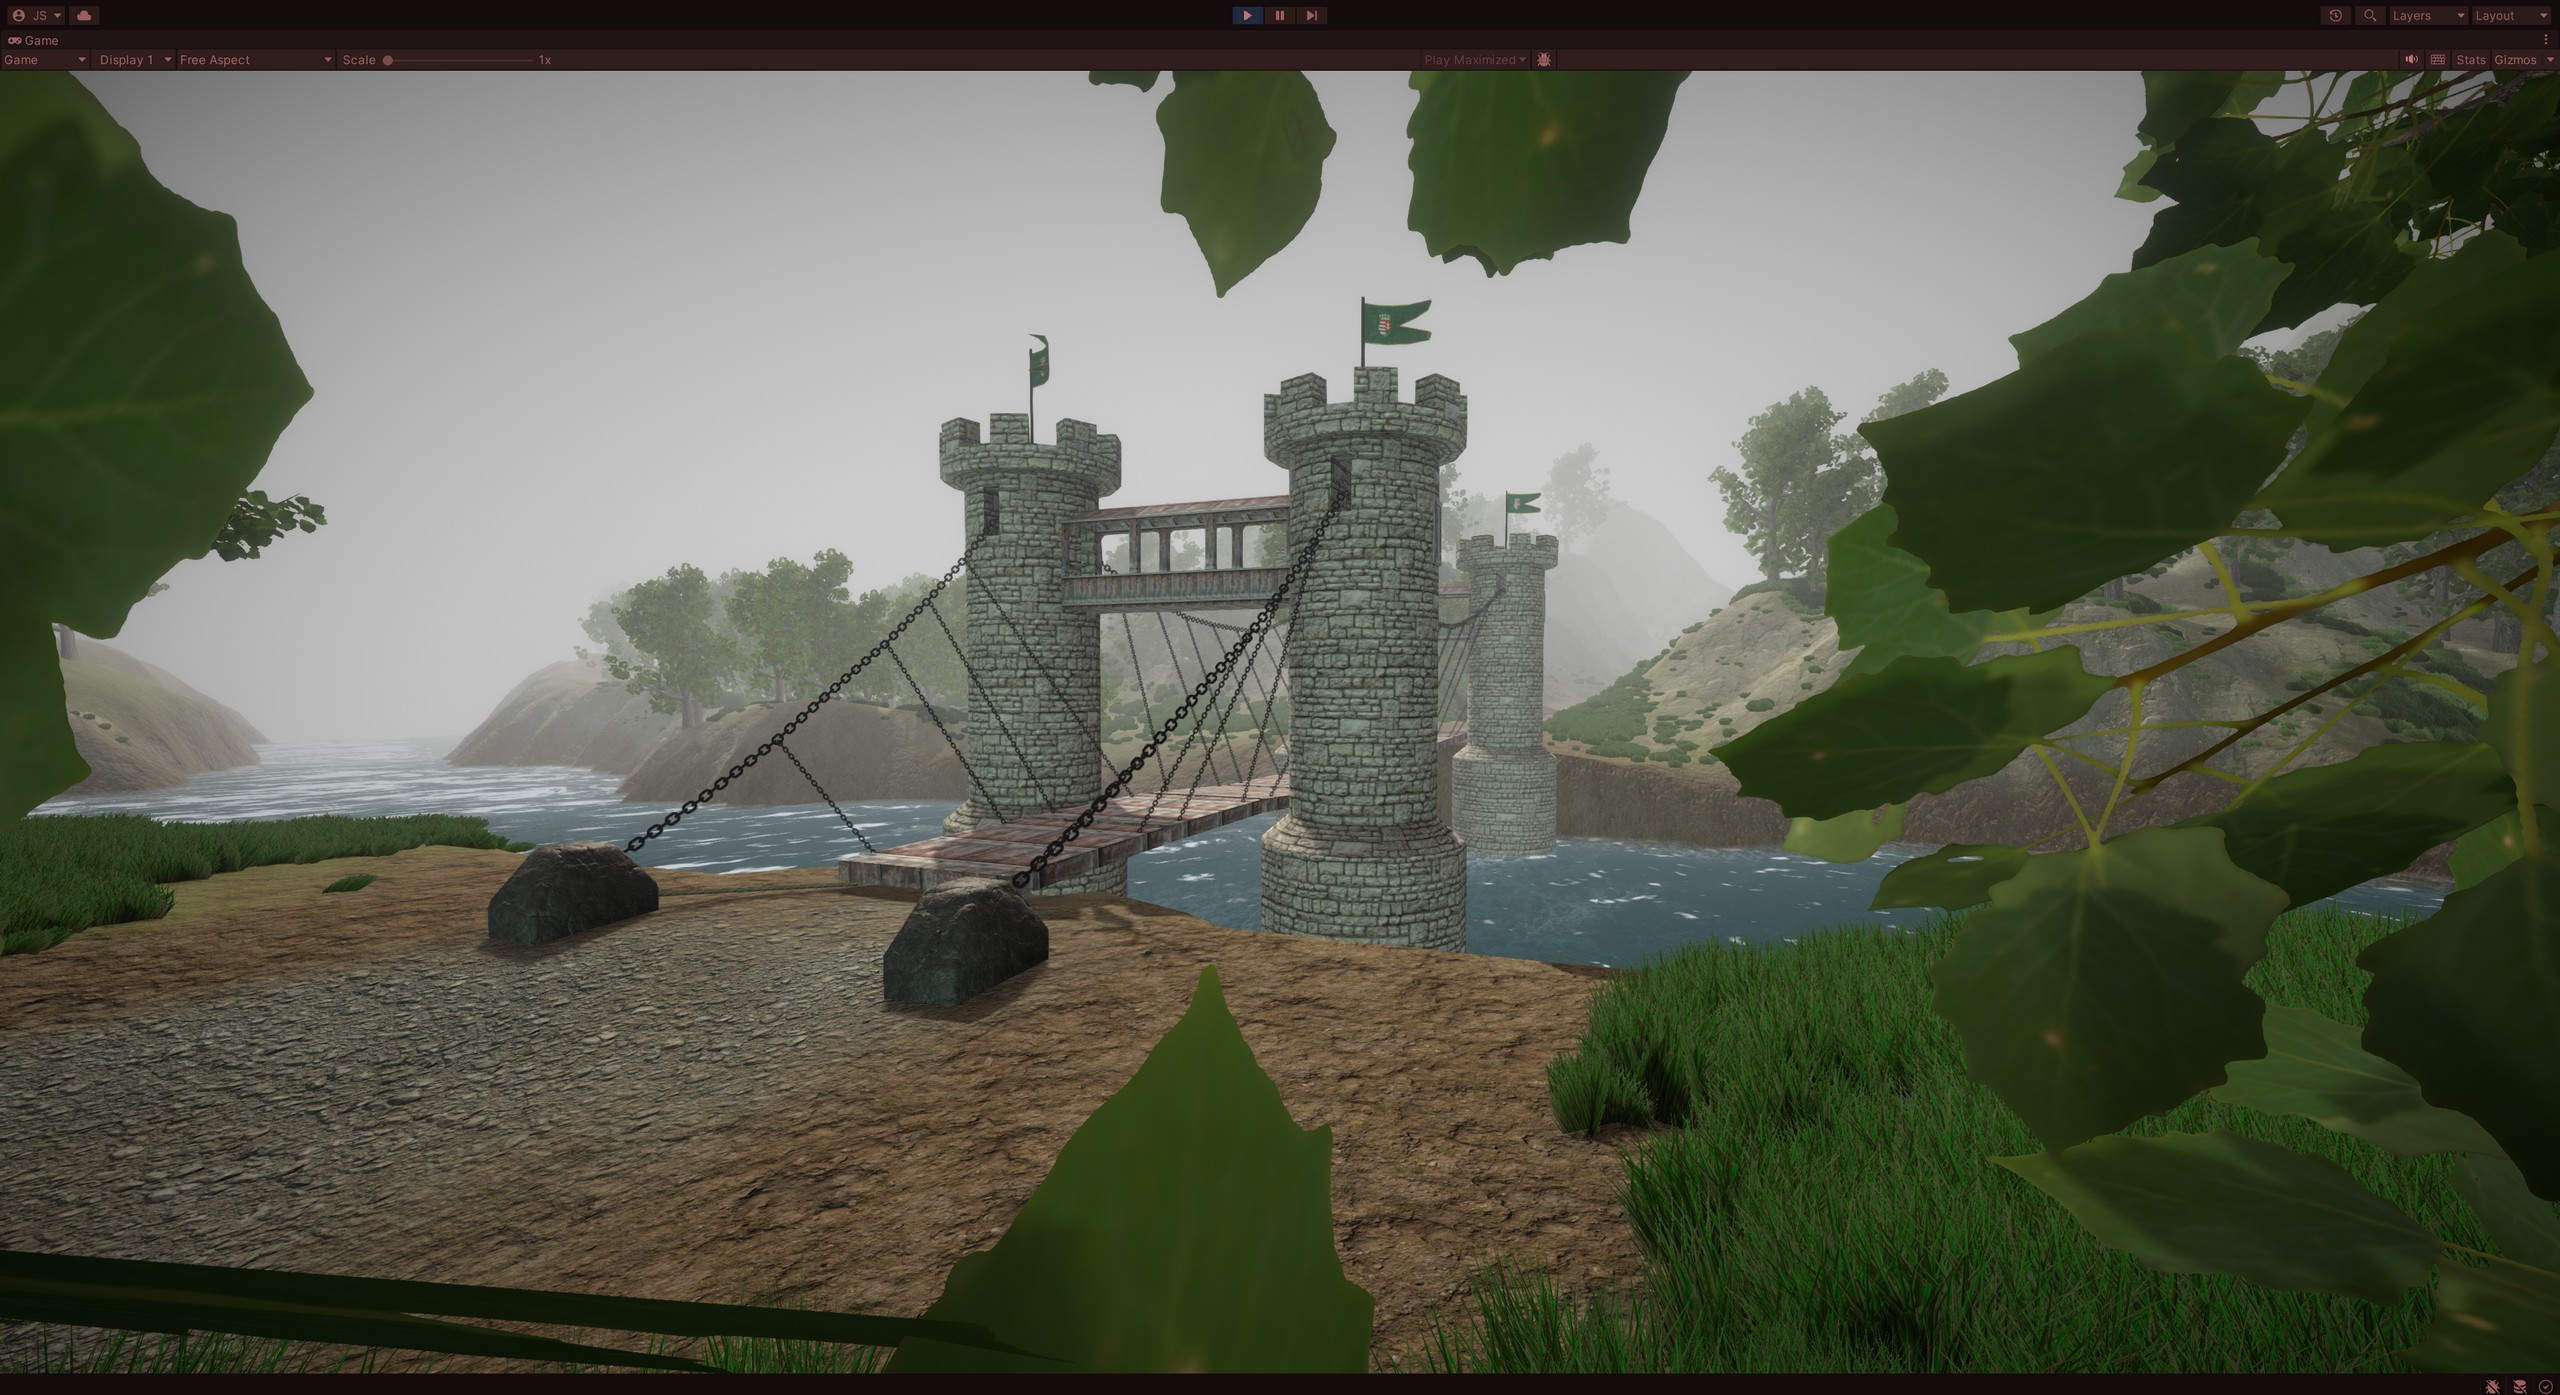
Peeking through the foliage
Scene: Medieval
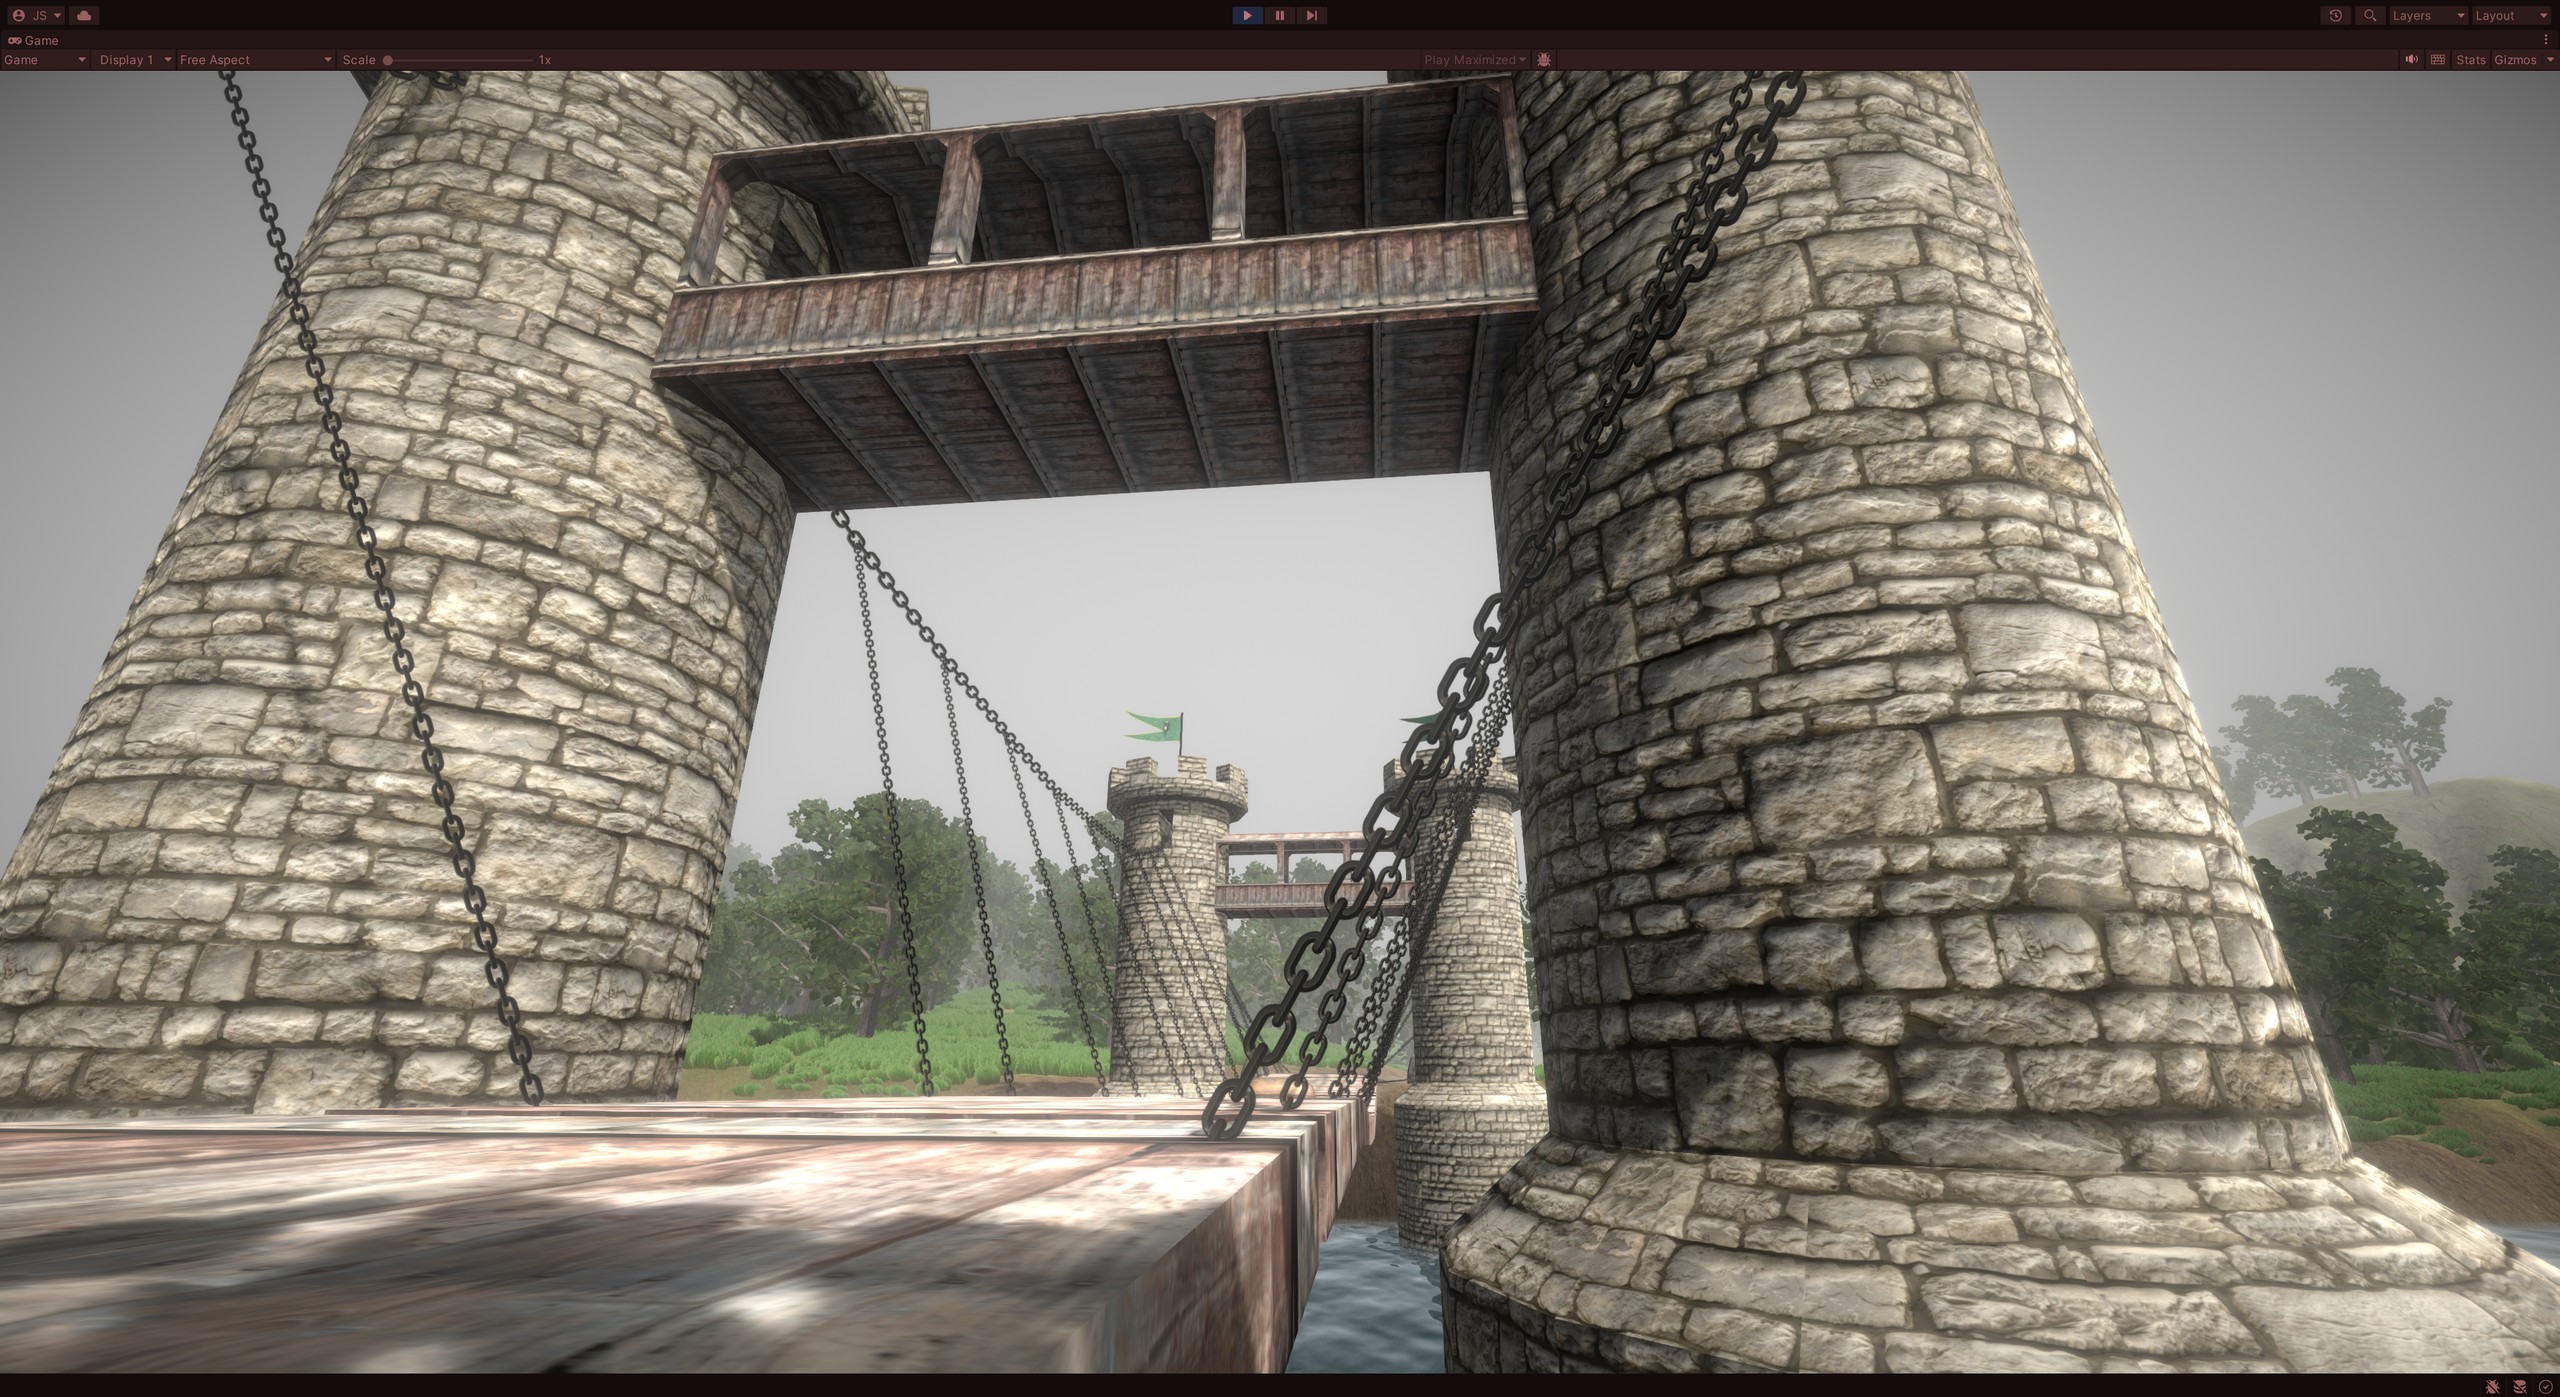
Chains holding the bridge
Scene: Medieval
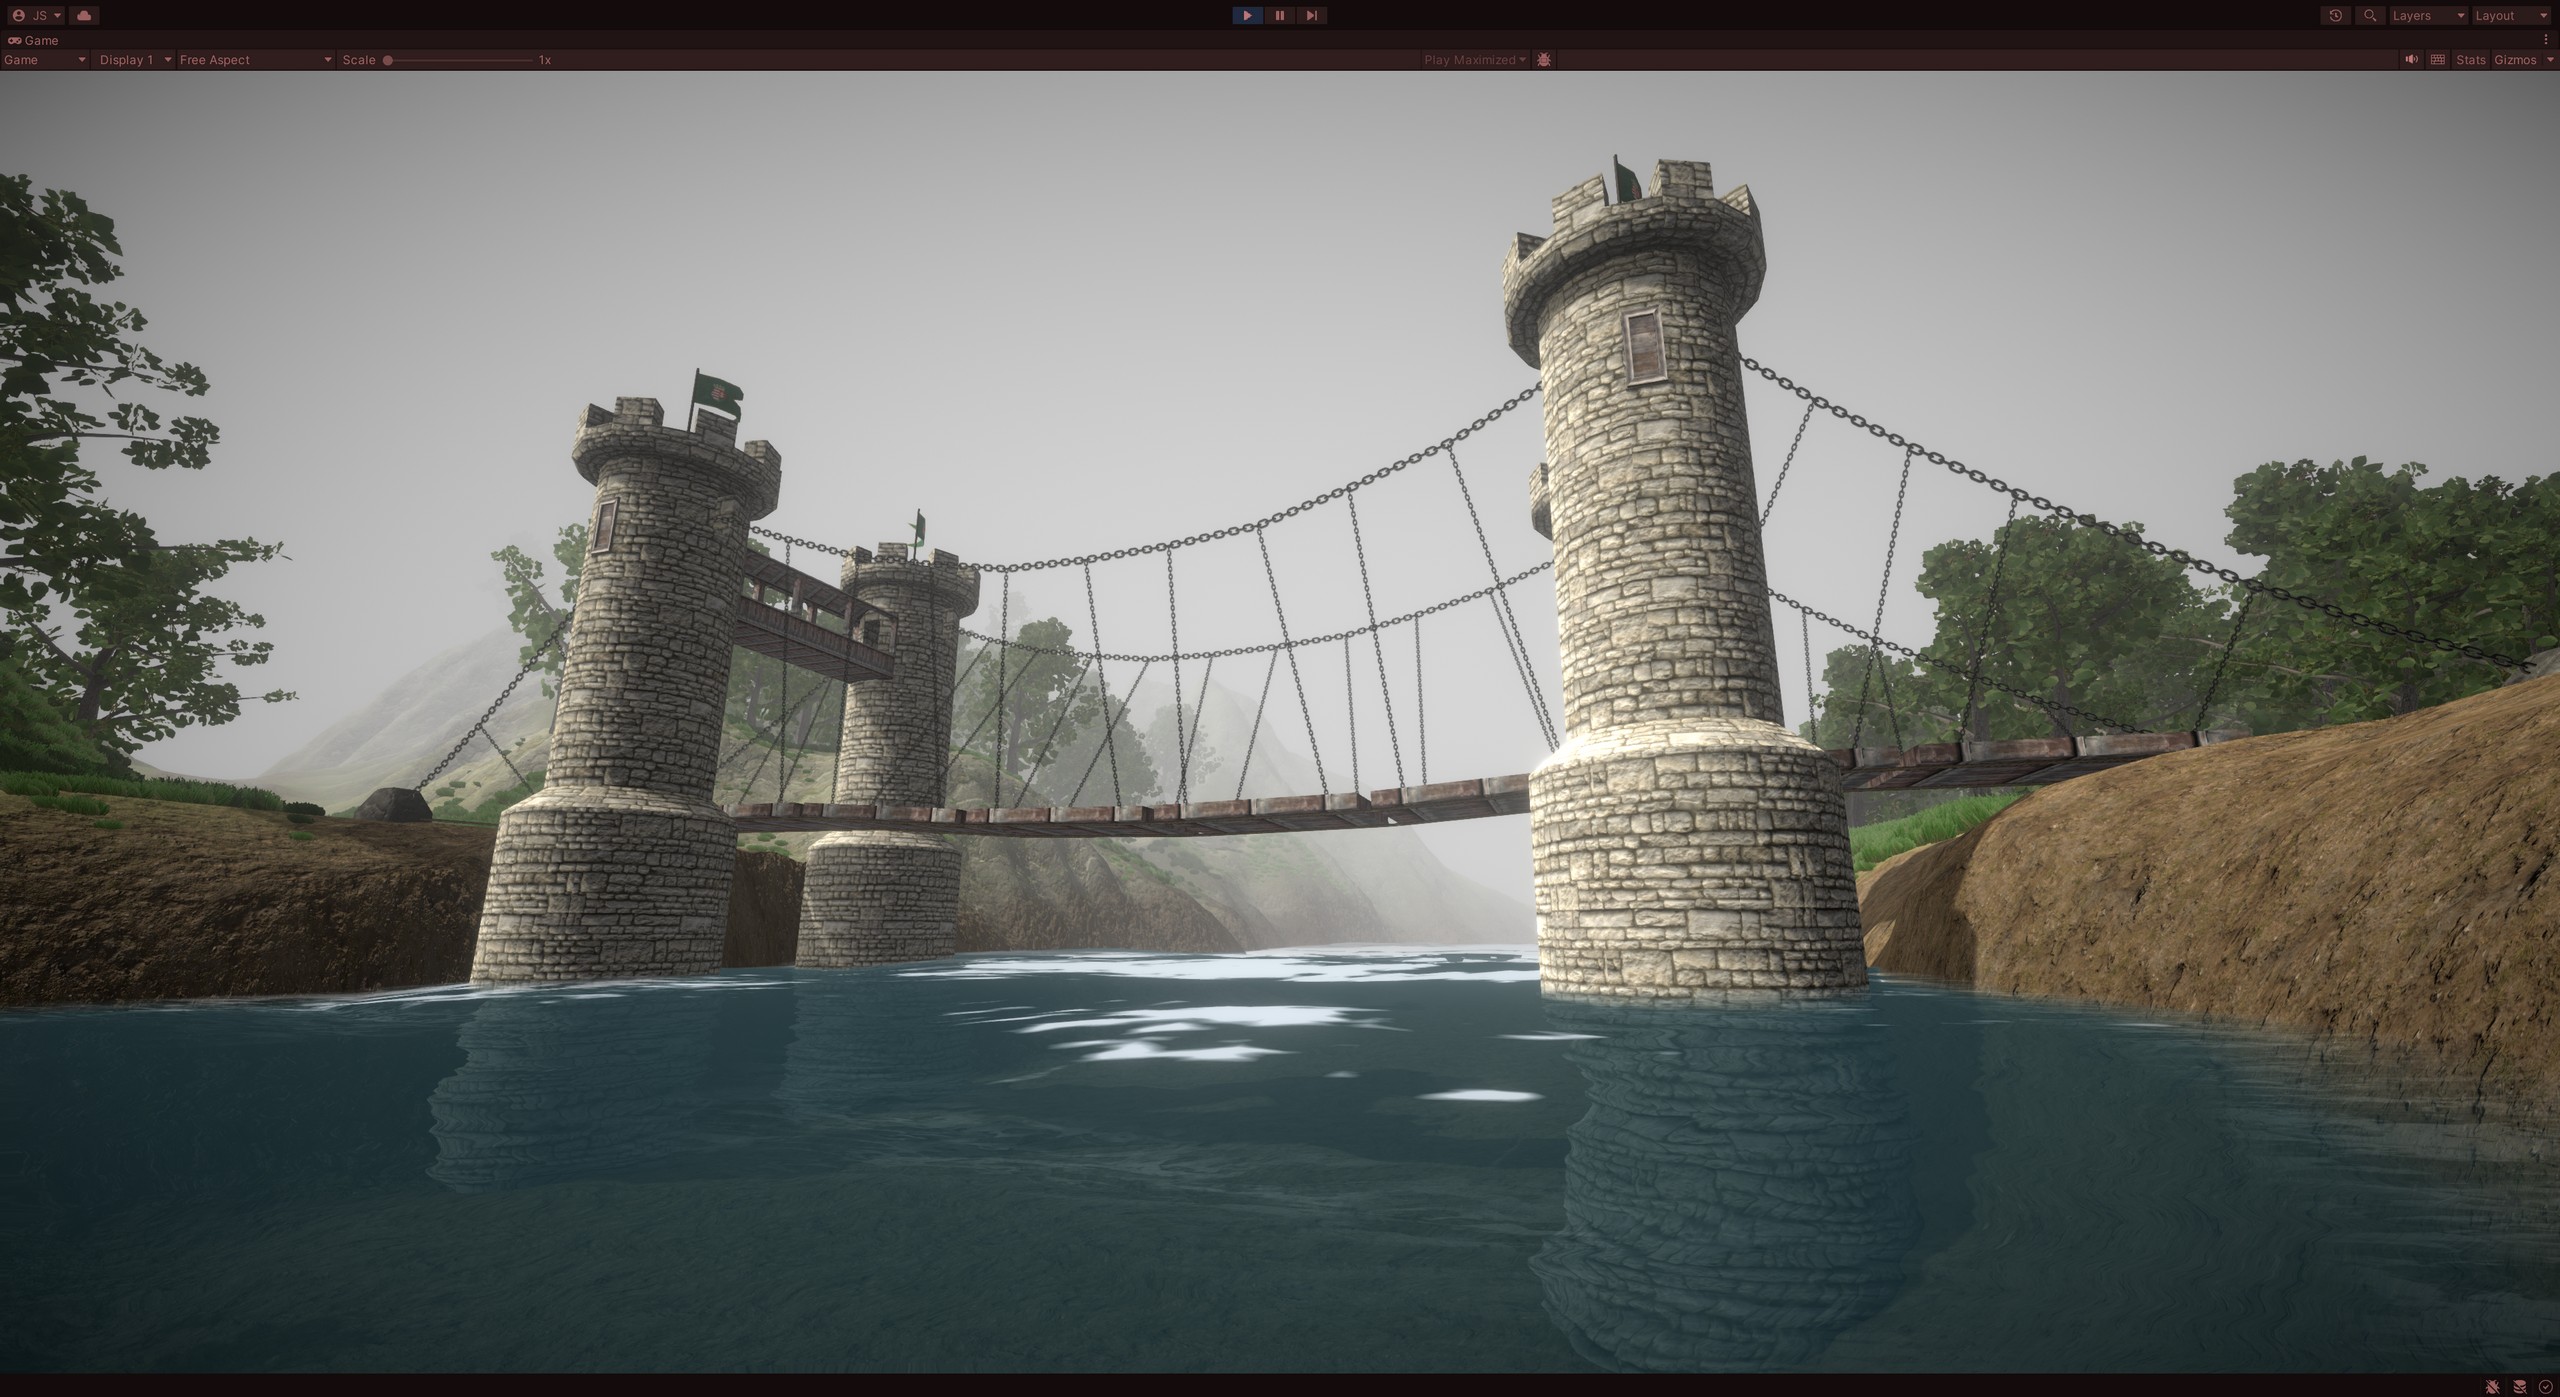
A view from above the river
Scene: Medieval
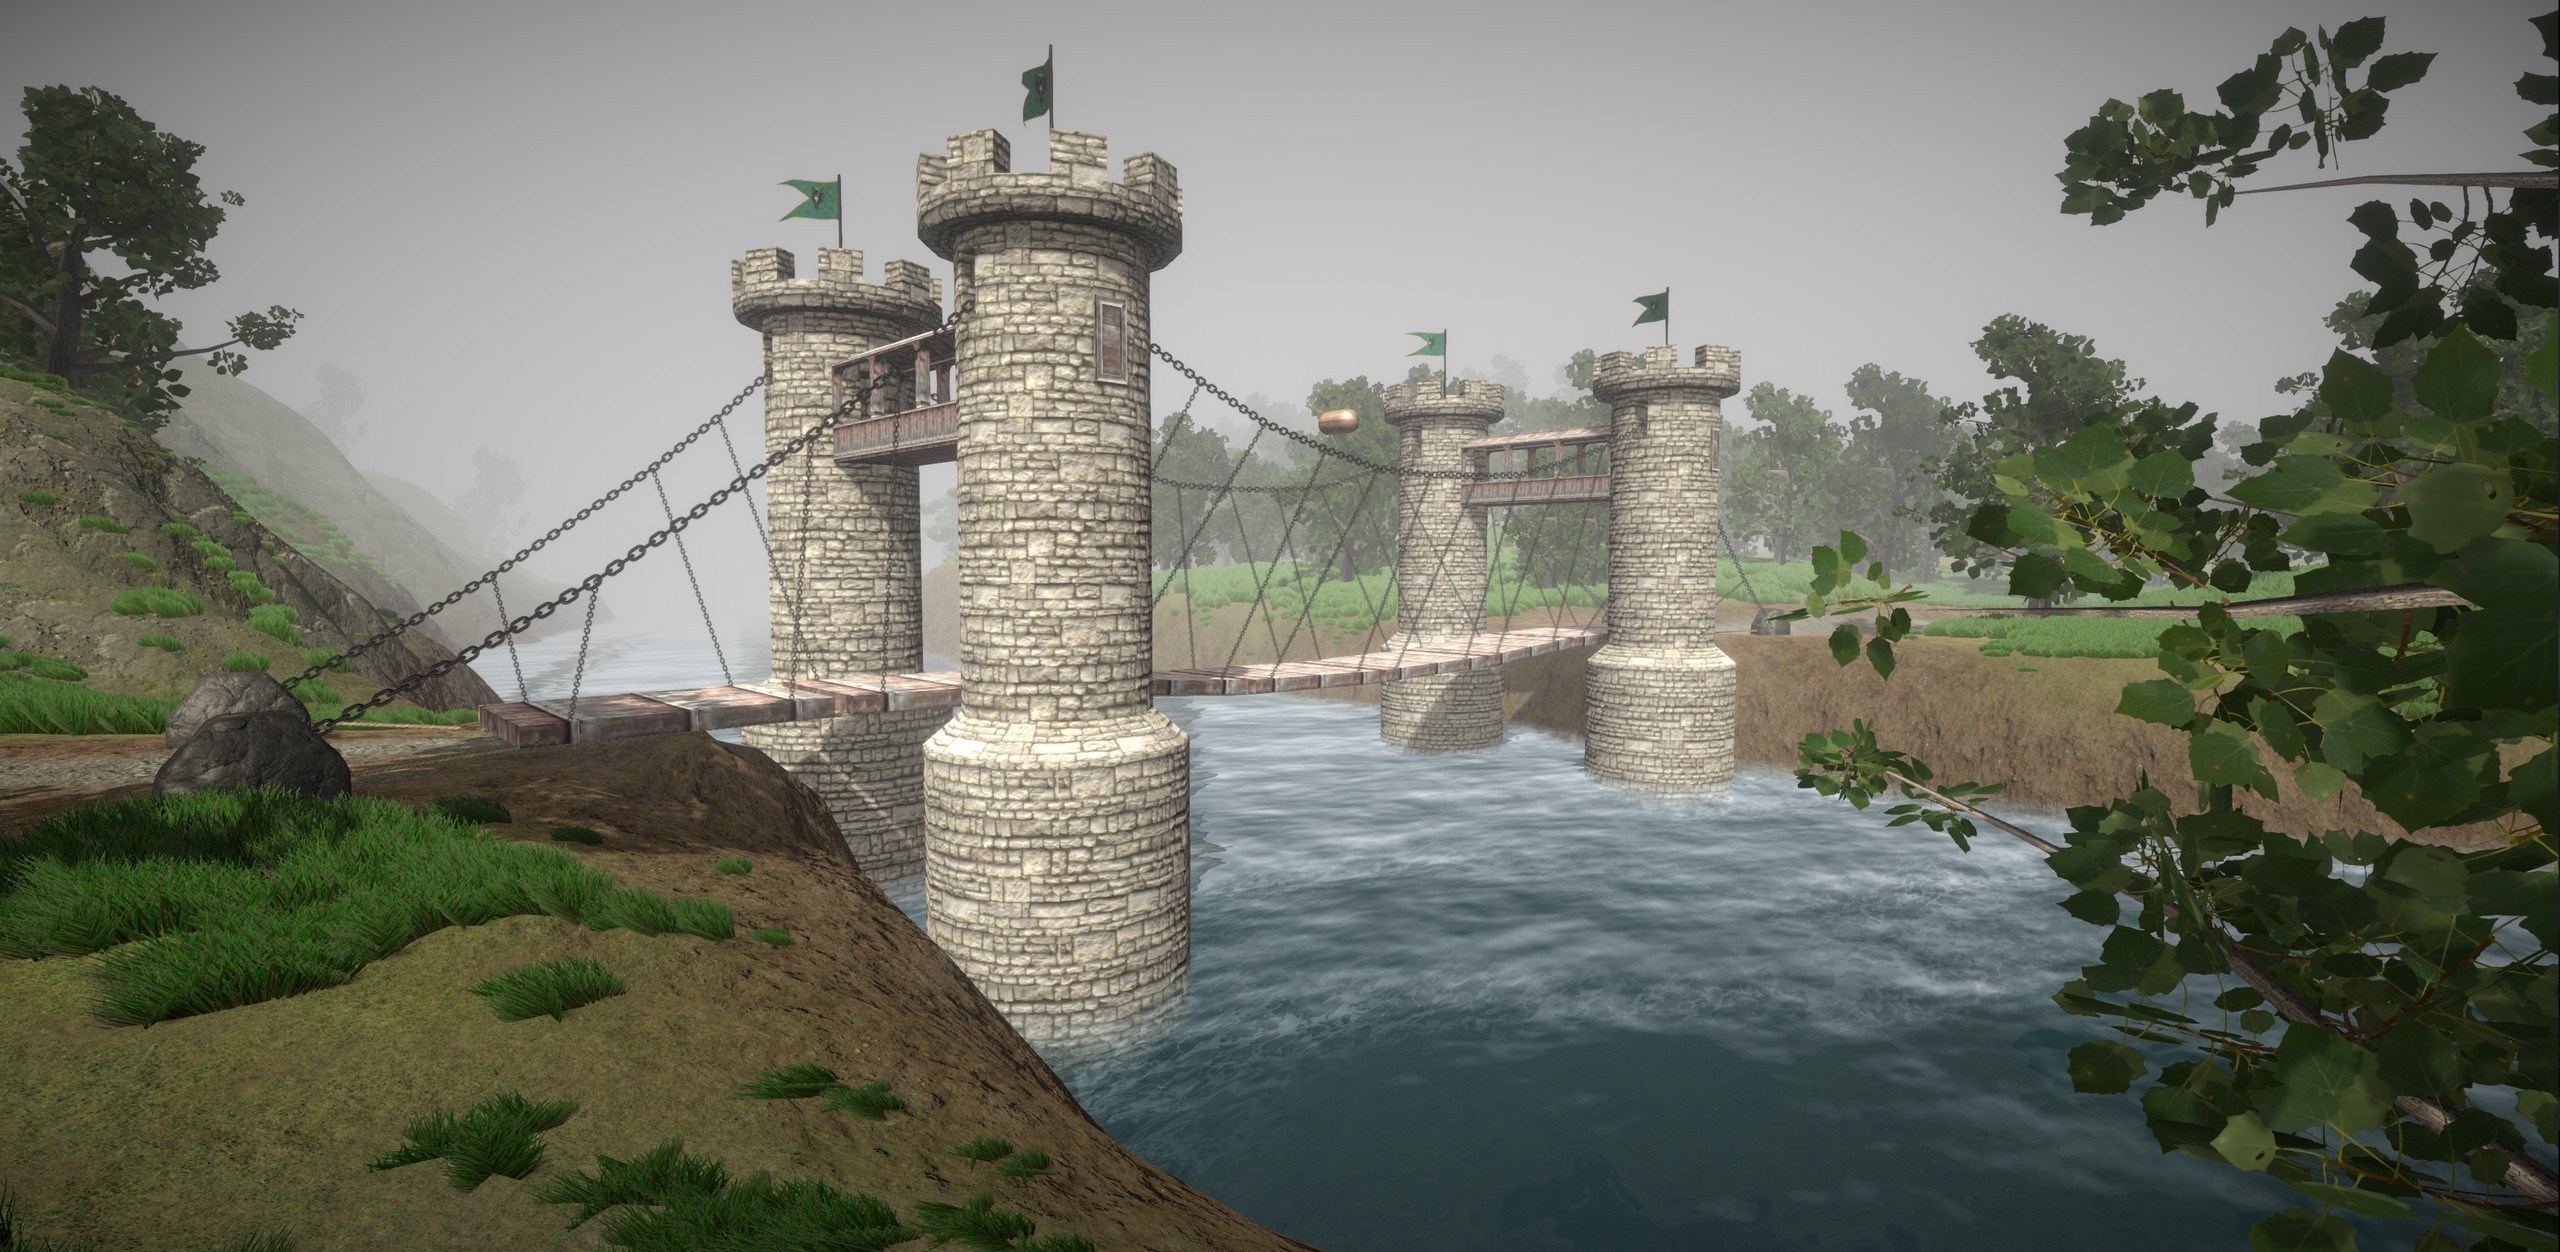
The Medieval bridge from an angle
Scene: Medieval
FAQ
Building bridges
Technical questions
Troubleshooting
Payment & License
What are the parts of a bridge?
With Bridge Master you can build bridges by putting the following parts together:
-
- Planks: the wiggling floor under your feet. You can even use huge road pieces. Up to 50 pieces in a single bridge.
- Towers: those high architectures usually close to the two ends of the bridge.
- Ropes: plank ropes, stay-cables, guide ropes, and support ropes.
What is the process to add a bridge to my scene?
After adding a Bridge GameObject in the scene from the menu, the planks, the towers, and the ropes need to be set up in just a few steps.
- Design the general visuals and architectural style of your bridge: single rope bridge, a suspension bridge or a cable-stayed bridge.
- Break down your bridge into separate elements:
- Create or gather the 3d models of the elements: planks, towers, and ropes.
- Move the pivot of the models to their center for which it’s not already there.
- Make prefabs out of those elements in Unity. Remember, the root of the prefabs needs to have default transformation, meaning Position=(0,0,0), Rotation=(0,0,0), Scale=(1,1,1).
- Add colliders to the elements where necessary. Use primitive colliders wherever possible.
- Put a Rigidbody component on the root GameObject of your plank prefabs and set the following properties:
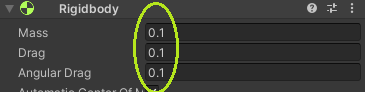
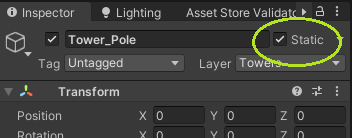
This is important to achieve a fairly stable construction. - Set your towers as static objects using the “Static” checkbox on the top right corner of the inspector panel. They are not moved by physics but can collide:
- Create a prefab for each type of rope you plan to use: plank ropes, stay cables, guide ropes, and support ropes. Each of these prefabs has to have a single LineRenderer component on the root object. The settings of this LineRenderer component will be cloned for the ropes when the bridge is generated.
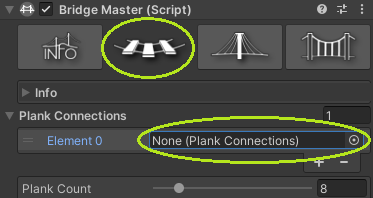
- Add a Plank Connections component to the root GameObject of each plank prefab and define the points where the ropes will connect them to other bridge elements such as other planks or towers.
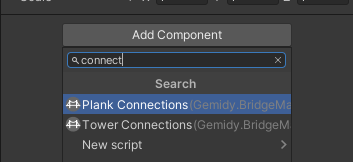
- Add a Tower Connections component to the root GameObject of each tower prefab and define the points where the ropes will connect them to other bridge elements such as planks or other towers.
- Add a Bridge GameObject to the scene. There are multiple ways of doing that:
- Select the “Bridge” menu item from the GameObject menu.
- Right-click on the Hierarchy view and select the “Bridge” item.
- Create an empty GameObject and add the “Bridge Master” component to it.
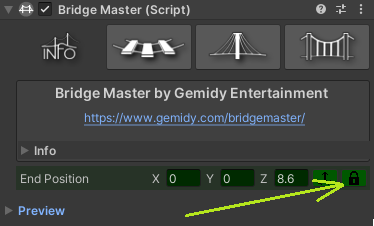
- Adjust the Start and End points of the bridge by clicking on the blue or green points in the Scene View. Please note that you can lock the endpoint by clicking on the padlock button on the Info page.
- Assign the previously created plank (or planks) to the bridge:
- Open the “Planks” page on the inspector panel of the bridge.
- Drag and drop the plank prefab from the project panel to the list of plank connections on the inspector panel.
- Drag and drop the plank rope prefab to the rope renderer field on the same inspector page.

- Similarly to the planks, assign the previously created towers to the bridge:
- On the Towers page of the Bridge inspector panel, click the “Add tower” button:
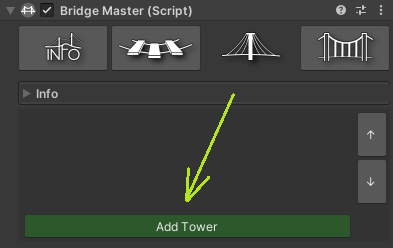
- Drag and drop the tower prefab from the project panel to the “Tower Connections” field on the inspector panel.

- Move the Tower to its desired position by dragging its handler in the Scene View or by changing the “Normalized position” and “Y offset” values on the inspector panel.
- In the case it’s a cable-stayed bridge, turn the “Stay Cables enabled” property on and drag and drop the relevant rope prefab onto the related “Rope renderer” property.
- On the Towers page of the Bridge inspector panel, click the “Add tower” button:
- If this architect is a suspension bridge that uses main cables and support ropes or has guide ropes, on the last page on the inspector panel of the bridge they can be configured:
- Press the “Add Guide Rope” button.

- Drag and drop the guide rope prefab to the rope renderer field on the same inspector page.
- Select the Connected towers which will be connected to each other using a guide rope.
- By default, the rope is rendered in a straight line, but by adjusting the Vertical and Horizontal Curve properties this can be easily changed in real-time.
- Drag and drop the support rope prefab to the related rope renderer field on the same inspector page in the “Support Ropes” section.
- Press the “Add Guide Rope” button.
- Finally, play with any of the properties on the inspector panel to achieve a state-of-the-art piece of architecture. Pay attention to the tooltips, for all of the properties there is plenty of useful information provided there.
You can watch the whole process of creating a fully functional bridge in the following tutorial video: https://youtu.be/2RYj34d1clY
Can I use custom models for my bridge?
Of course, moreover, that is the recommended way to build one. All the models included with the asset are basically for demonstration purposes only.
What scale and level of complexity are supported?
- A bridge can handle 50 pieces of planks.
- A bridge can stretch as far as you want.
- The meshes used by the bridge can be as complex as you want.
- There are no limits on the number of towers in a bridge.
- As the colliders are on the prefabs you provide, it’s also up to you how complex they are.
- There are no limits on the number of guide ropes you define.
- The cables/ropes are generated using LineRenderer. No other solution is supported yet.
What types of rope is used in a bridge?
There are 4 different types of ropes to customize:
-
- Plank ropes: these connect the planks to each other.
- Stay-cables: for cable-stayed bridges, these fix the planks to the towers.
- Guide ropes: connect the towers to each other. Most common for suspension bridges.
- Support ropes: hang the planks on the Guide ropes.
What do “Rear” and “Front” mean?
Can I have multiple guide ropes between the same two towers?
Yes, you can. For instance one of them can be an actual guide rope or some kind of fence, while the other can be a main cable. There are no such restrictions in setting up your guide ropes, though please keep in mind that guide ropes cost the most in performance.
How many towers can this tool handle in a single bridge?
No limits. At least yet. 😉
How long can my bridge be?
How much time does it take to generate a bridge?
Is coding required to make a completely working bridge?
Does this tool generate the necessary 3D models too?
Definitely not. This tool is made to add life to your already existing visual content by connecting the bridge elements together using joints (physics) and ropes (visuals). You need the following to create a bridge:
-
- Plank or road graphics: model and its textures.
- Tower graphics, if there is a tower in your bridge at all: model and its textures.
- Rope texture: at least if you want a textured rope. Otherwise, you can create any kind of LineRenderer that suits your needs.
The package contains sample models and textures that you can use to create your own bridges, moreover, there are generated bridges already that you can use. Of course, to have something unique, it is worth having your own models and textures in your hand for that.
How are the ropes visualized?
The ropes use Line Renderer component. To set up a rope, just create a prefab that has a LineRenderer on its root object and assign it to the related rope field. When a bridge is generated, all the relevant properties of the assigned prefab will be cloned.
Is it a CAD or any type of engineering tool?
No, not at all. This is a bridge builder utility mainly for computer game development teams, and optimized for real-time visualization. Even though Bridge Master Unity Asset is not built for simulation or high-precision engineering, its architectural elements are inspired by real-life scenarios. We made this asset with an engineering mindset to make the final result act like those architectural wonders in real life, but also, our main goal was to make it possible to use it in a wide range of games from a small mobile game to even a AAA title.
How optimized will my bridge be?
Can I use a bridge created with Bridge Master in a mobile game?
I’m aiming for low-end hardware, or mobile platform, which settings should I keep an eye on?
Plank settings
-
- Plank Count: use as few planks as possible, high influence on performance. If the distance is too large to decrease the number of planks, consider merging multiple planks together in a single object.
- Gravity On Planks: Every 2nd. This eases the load of the whole structure for the physics engine and makes it more stable.
- Plank Rope Continuous: Check it in. A continuous rope uses a single Line Renderer component for each rope along the whole bridge (one on the left and one on the right) instead of creating a LineRenderer for every pair of rope nodes.
- Plank Rope Connection Type: Set to Single. This way the bridge will add a single rope node for each plank. There is a chance of some intersection with the edge of the planks, but that’s only a visual glitch, it does not ruin the physics as ropes do not collide.
Stay Cables settings
-
- Stay Cables Per Plank: Single. Keep the number of ropes as low as you can. It affects the visuals only, so does not affect the performance too much.
Guide Ropes settings
-
- Number of guide ropes: keep it as low as possible.
- Guide Rope Segments Count: keep it as low as possible. It’s important that this is not just a visual setting, but influences the physics of the bridge the most, thus affecting the performance vastly. Every node on a rope is a dynamic physics object (Rigidbody).
- Segment Count to Planks Ratio: The same applies here. When the number of segments is synced with the planks, this is the available property instead of the previous one.
- Gravity on rope nodes: Without Support Joint. This makes the guide rope less prone to its own weight and causes to put gravity on the nodes that are not connected to any of the planks by a support rope. So while the nodes connected to a support rope will be pulled downwards by the weight of the connected plank, the nodes without any connection will still be pulled down by gravity. This way there will not be floating nodes in the guide rope.
Support Ropes settings
-
- Joints to Planks: Planks with Gravity. This way even if a support rope is drawn, it will be connected with a joint to a plank only, when the visually connected plank has gravity on it. This also can save some resources.
What code makes the bridge work during runtime?
It’s difficult to see my bridge in the preview image.
Due to the different light conditions and other factors, sometimes it can be hard to see the bridge on the inspector panel preview. For these cases, there is a property to override the shader used by the materials of the bridge elements.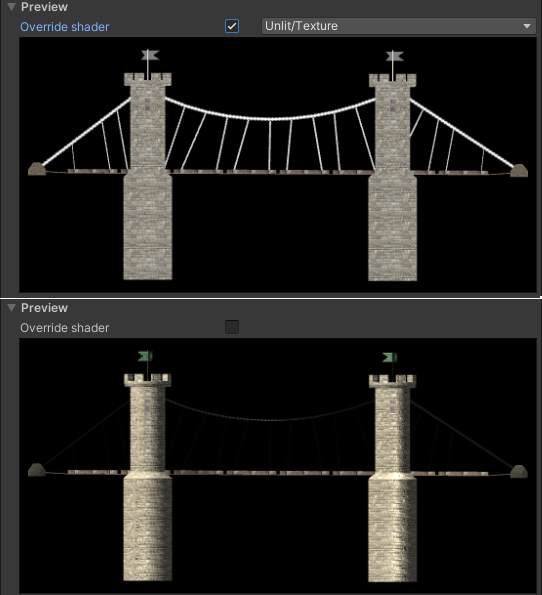
If the bridge uses textures, the Unlit/Texture works most of the time, while for bridges having materials without an albedo texture, the Unlit/Color used to be the best choice.
The bridge has a weird behavior when the scale of the planks are changed.
This is a general rule of thumb: don’t scale any objects in Unity which has a Rigidbody on it. If you need to resize a mesh, change it using a 3D modeler, like Blender, or use the great ProBuilder tool in Unity.
I changed the properties of the LineRenderer component on my rope, but the Bridge does not seem to follow my changes.
When I walk on the bridge with my character or drive on it with a car, the bridge is not strong enough to hold it.
For the sake of stability, it is recommended to keep the mass of the bridge elements low. It’s even more important when the bridge is a suspension bridge that basically consists of a chain of joints. For this reason, any object that potentially can move over the bridge should have a mass between 0~5. The cable-stayed structures are more stable in this regard.
When I run my scene, the whole bridge stretches downwards, the joints seem to struggle to hold the planks together.
-
- The planks are too heavy, try making them much easier. A mass between 0.1~1 should work.
- Try setting the gravity on every 2nd plank only. Property: Planks / Gravity On Planks = Every 2nd Only.
- Try applying gravity on those guide ropes’ nodes that are necessary: Guide Ropes / Gravity on Rope Nodes = Without Support Joint.
- Finally, if none of the above was enough: put a little strain on the guide ropes using the slider: Guide Ropes / Joint Strain. A value of 0.01 usually is enough.
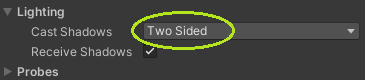
Not all of my ropes cast shadows.
Don’t forget to set the shadow casting to two-sided for the LineRenderer in your rope prefab.
Can I use the assets in my project which come with the Bridge Master?
Yes, every model, bridge, and other assets are fine to use, though the prebuilt bridges and the included assets are there mainly for demonstration purposes. Also, please pay attention to the license documents of the 3rd party assets that can describe specific requirements.
Is the source code included?
Contact us
Drop us a line if you feel so.